- A+
Vmware Station安装Arch Linux
一、测试环境及工具
当前教程在win10环境中进行,网络为有线连接
vmware station版本为 16.2.1
arch linux镜像为 archlinux-2022.04.05-x86_64.iso
终端工具Xshell 6,也可使用putty,mobaxterm,finalshell等工具均可,没有区别
二、下载arch linux镜像
访问阿里开源镜像站
http://mirrors.aliyun.com/archlinux/iso/
选择当前最新版本,用下载工具下载到本地
http://mirrors.aliyun.com/archlinux/iso/2022.04.05/archlinux-2022.04.05-x86_64.iso
三、vmware创建虚拟机
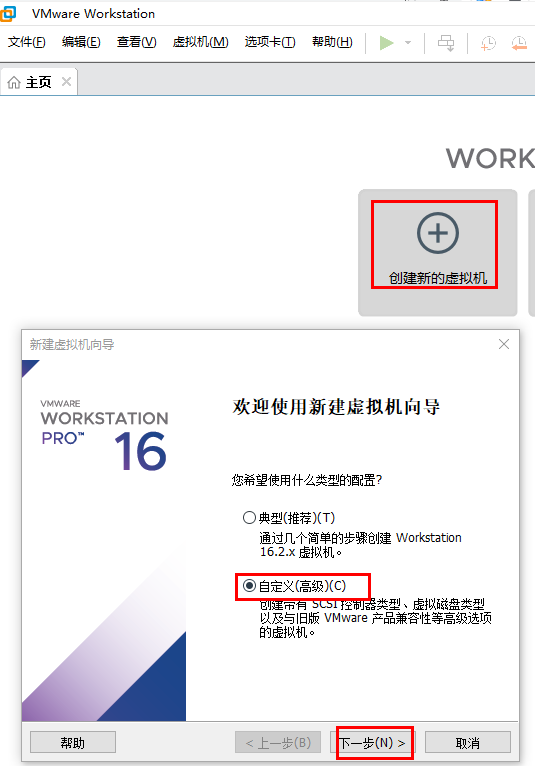
创建新的虚拟机-->自定义(高级)
默认下一步
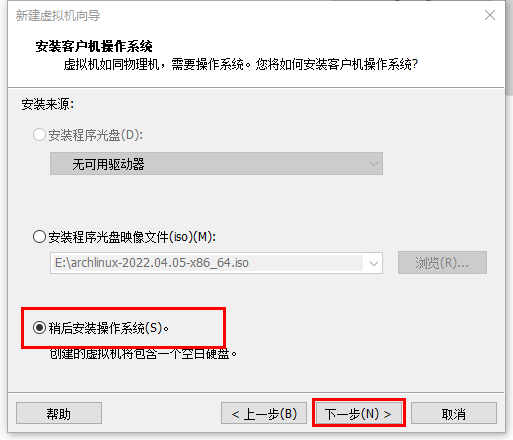
选择稍后安装操作系统
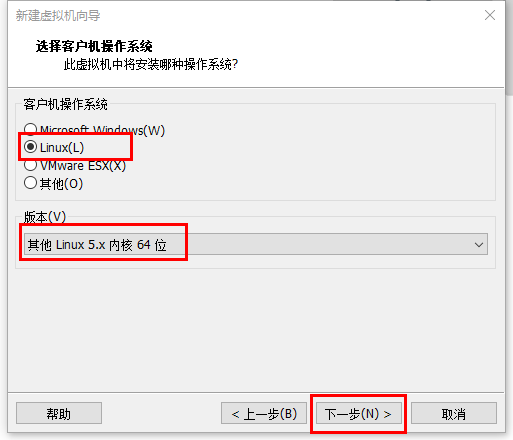
选择Linux和其他linux 5.x内核64位
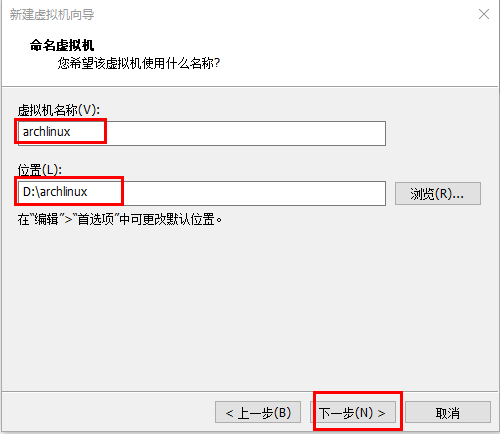
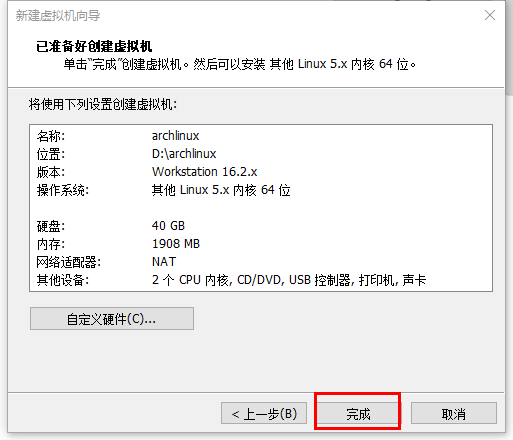
自定义虚拟机名称和虚拟机的保存位置
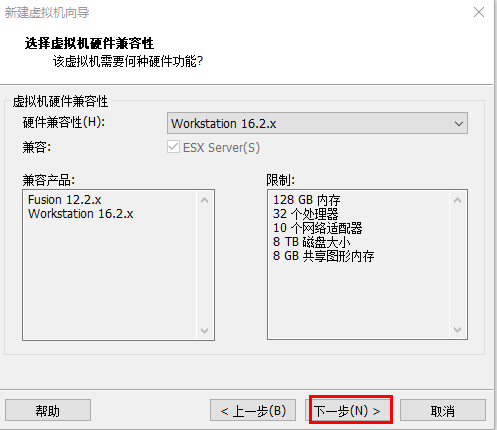
默认下一步
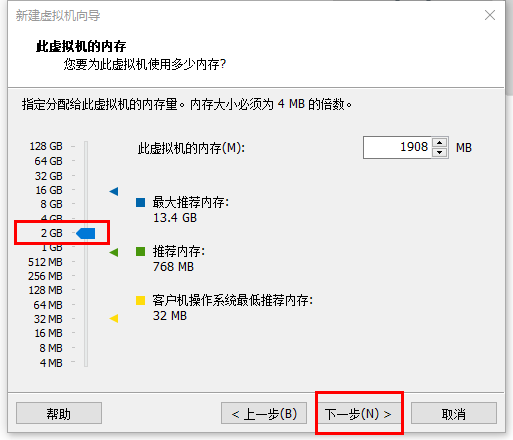
根据自己的情况配置虚拟机内存,当前配置成2GB
默认下一步
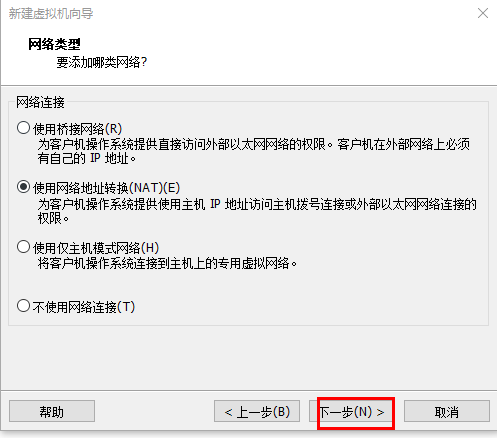
默认下一步
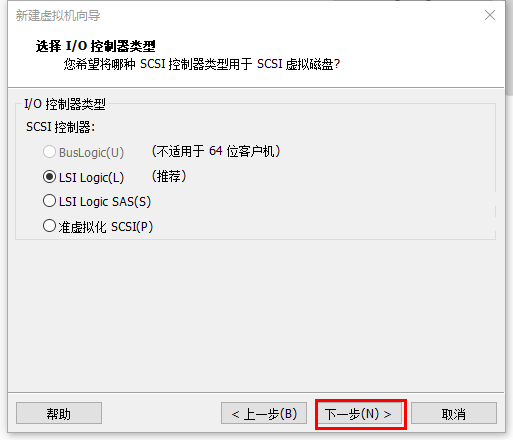
默认下一步
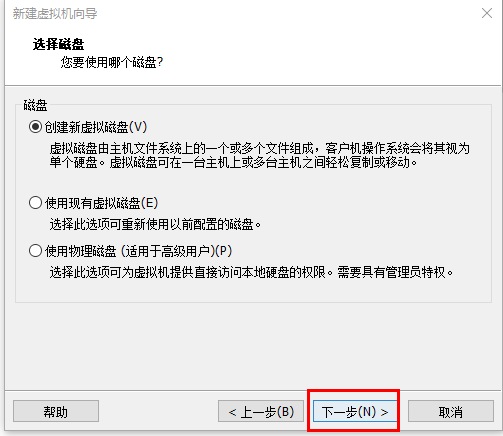
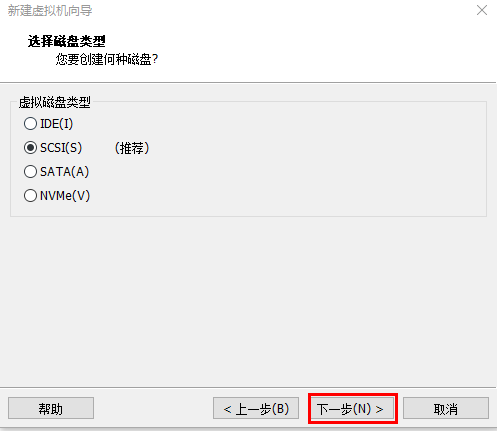
创建新虚拟磁盘,下一步
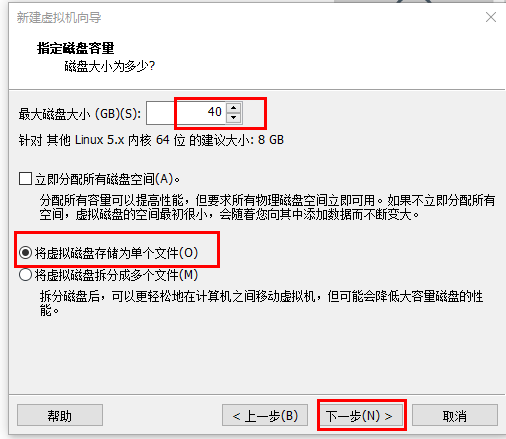
自定义磁盘大小,选择将虚拟磁务存储为单个文件
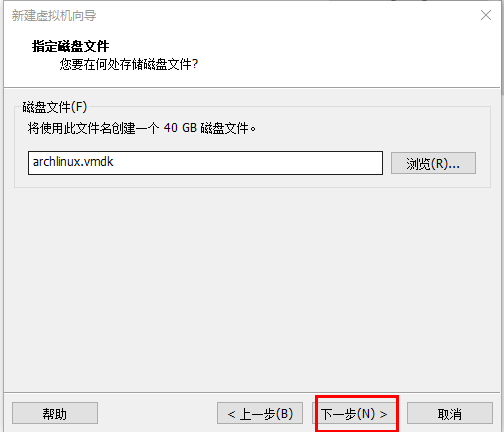
默认下一步
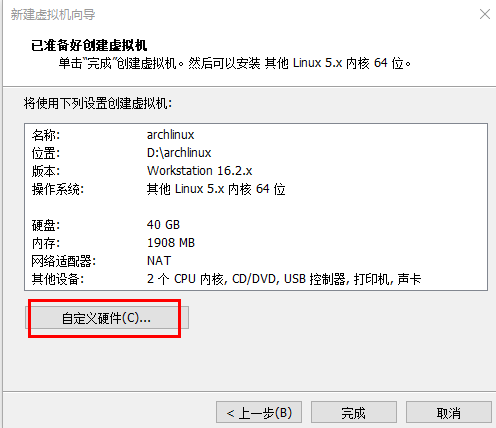
选择自定义硬件
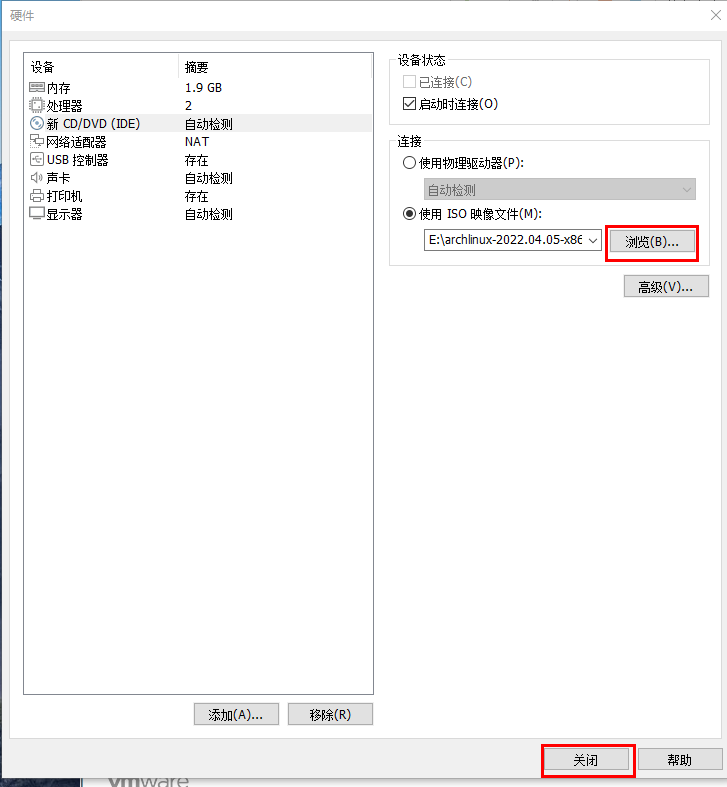
设置arch linux的iso路径
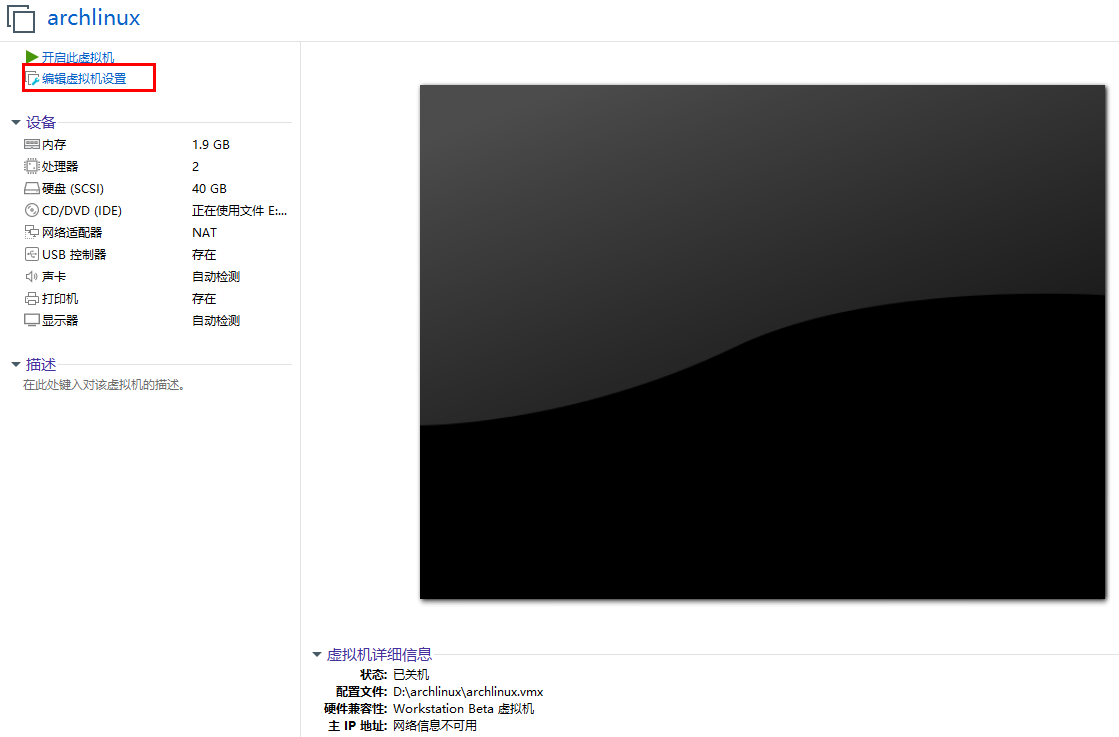
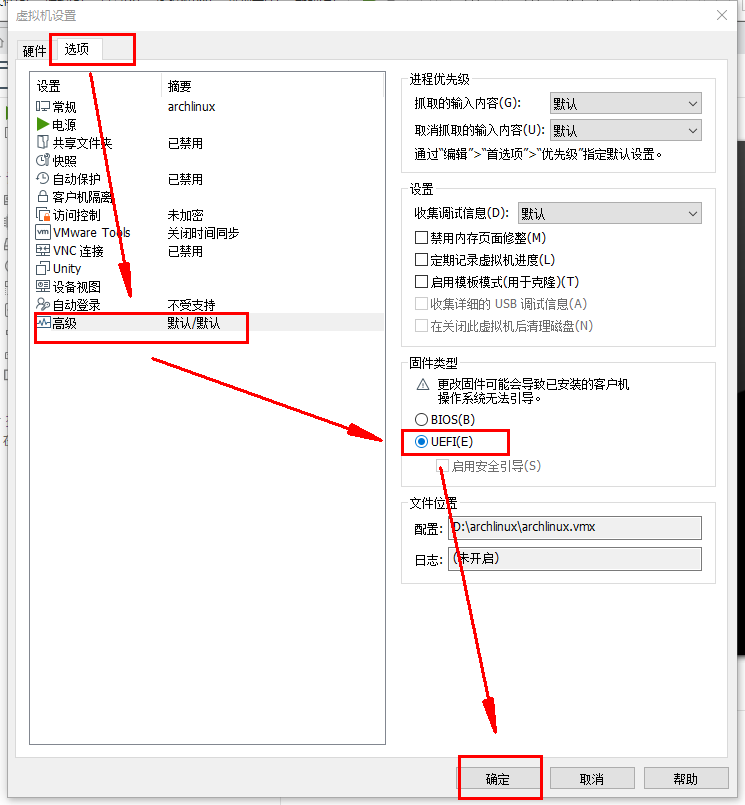
编辑虚拟机设置,设置uefi启动
四、安装arch linux
1. 远程终端登录
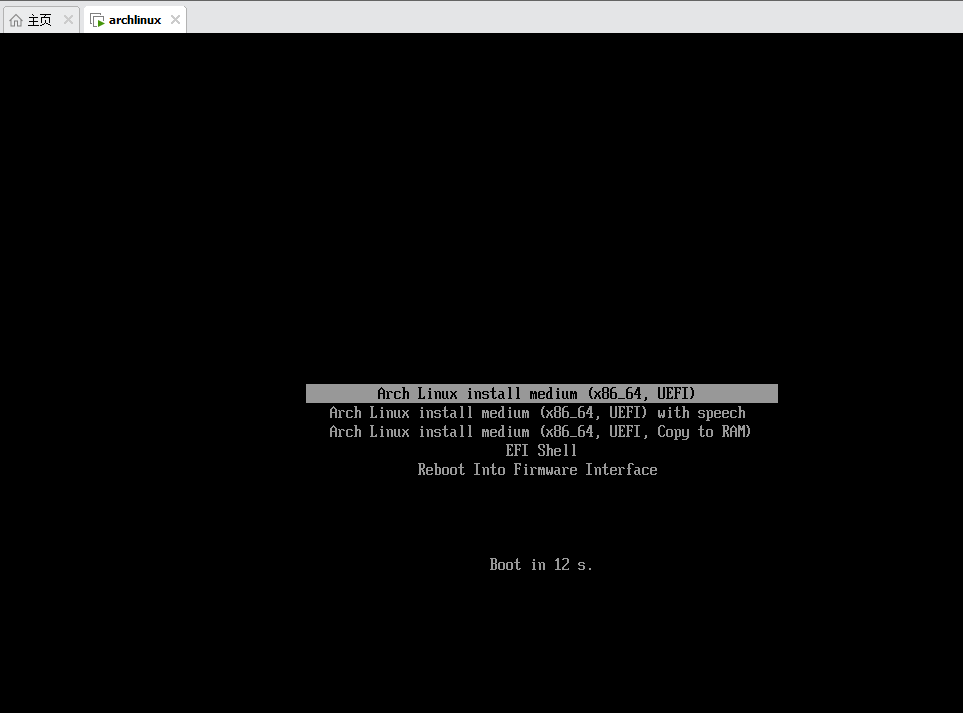
启动虚拟机,进入终端界面
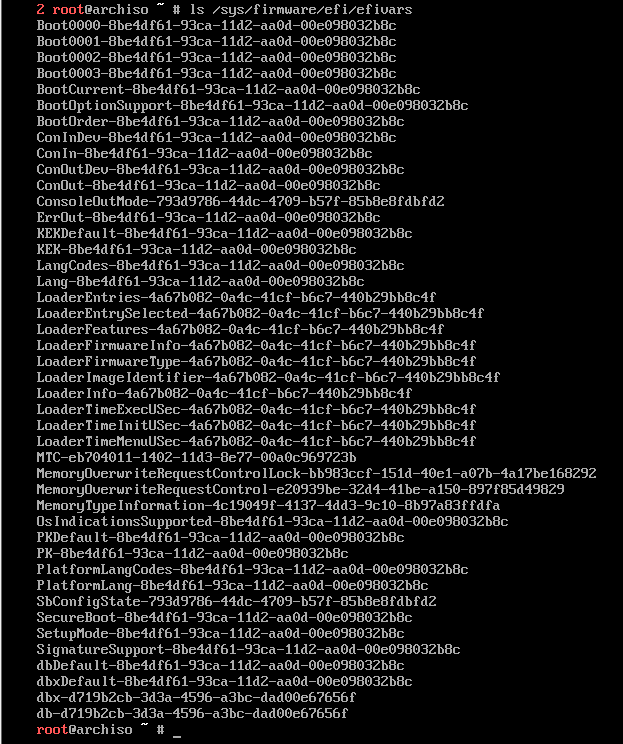
ls /sys/firmware/efi/efivars 如果结果显示了目录且没有报告错误,则系统是以 UEFI 模式引导的。
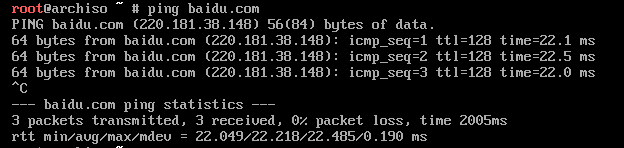
ping某个公网的域名,测试网络是否是通的,通了才能进行后面的步骤。
执行以下命令查看启动系统IP
ip -brief address 
设置一个临时密码,简单点就好
passwd 使用终端连接工具ssh连接启动系统,用root和刚设置的密码登录。这么做是为了方便复制命令,毕竟手动在虚拟机上敲不仅慢,还容易出错。
2. iso启动系统更换国内源
由于在安装arch linux过程中,需要通过网络下载安装相关包,默认的国外源速度太慢,故配置成国内源进行安装。
安装中出现yes/no的提示时一率按回车,后面的步骤不再额外说明
pacman -Sy vim 等待安装成功后,给iso启动系统配置阿里开源镜像站的软件源
用vim编辑/etc/pacman.conf文件,末尾添加以下两行:
[archlinuxcn] Server = https://mirrors.aliyun.com/archlinuxcn/$arch vim /etc/pacman.d/mirrorlist把以下配置放到所有Server链接的最上面
Server = https://mirrors.aliyun.com/archlinux/$repo/os/$arch
保存退出后安装 archlinuxcn-keyring 包导入GPG key。
pacman -Sy archlinuxcn-keyring 3. 磁盘分区
按以下的分区种类分三个区即可,内存较小时,swap分区一般设为真实内存的两倍,本教程虚拟机内存是2G,所以swap分区给4G就行。
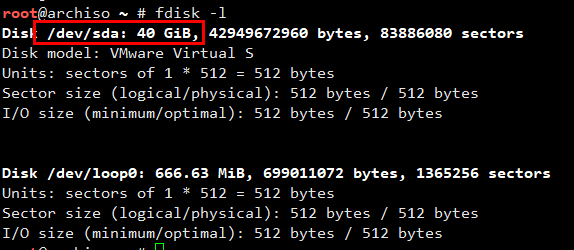
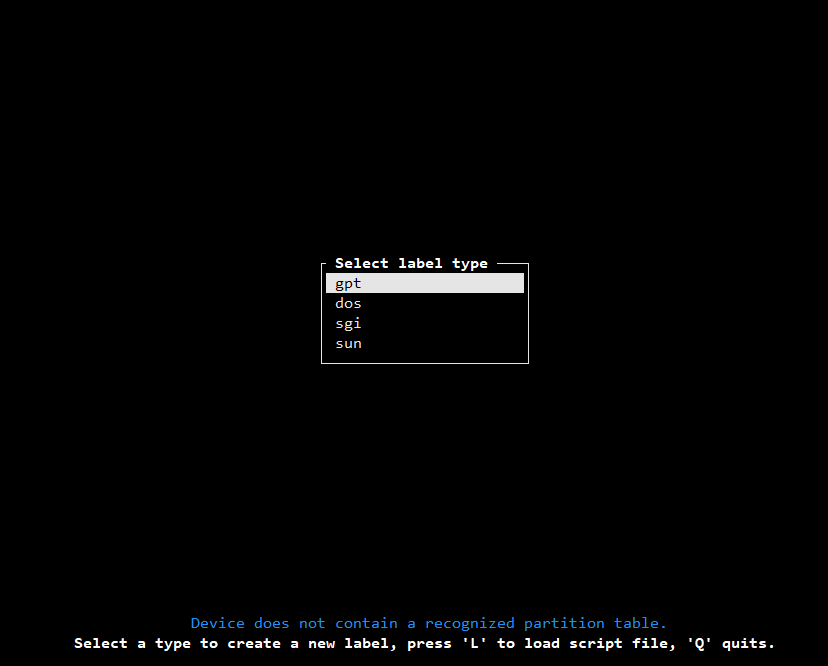
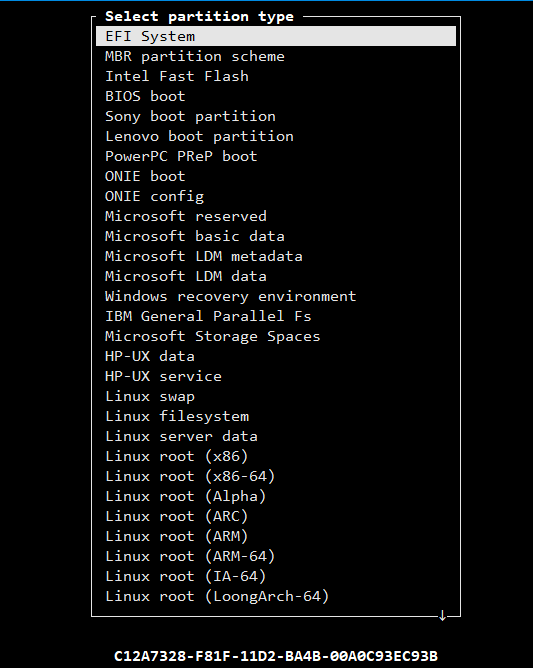
EFI分区 300 MB swap分区 4GB root分区 剩余空间 fdisk -l查看磁盘信息,并执行cfdisk命令,如此教程中为cfdisk /dev/sda
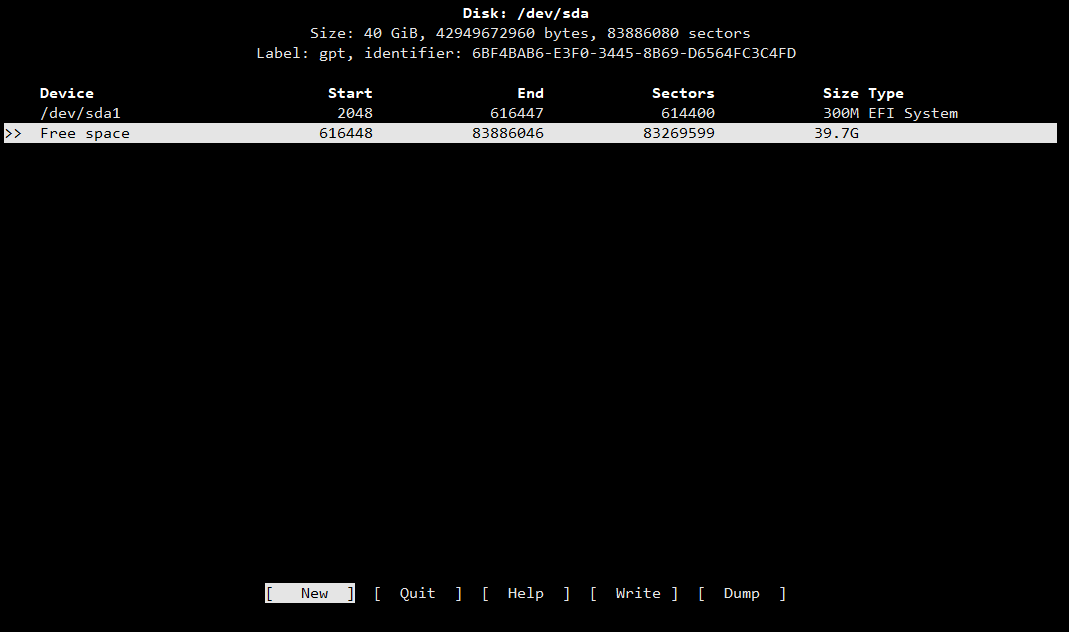
选择gpt分区表,回车
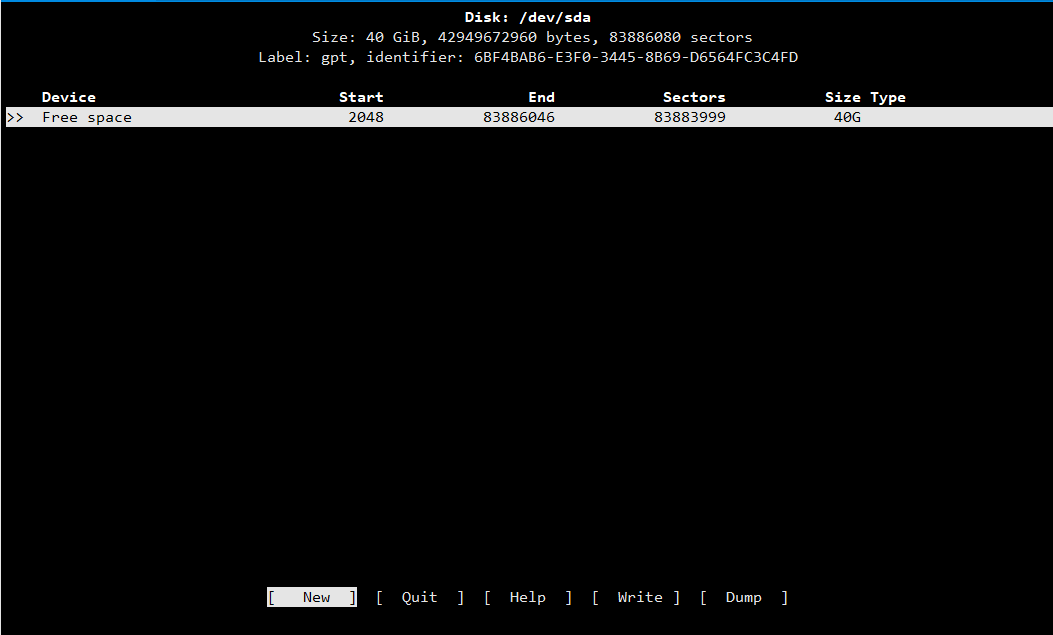
选择[ New ],回车
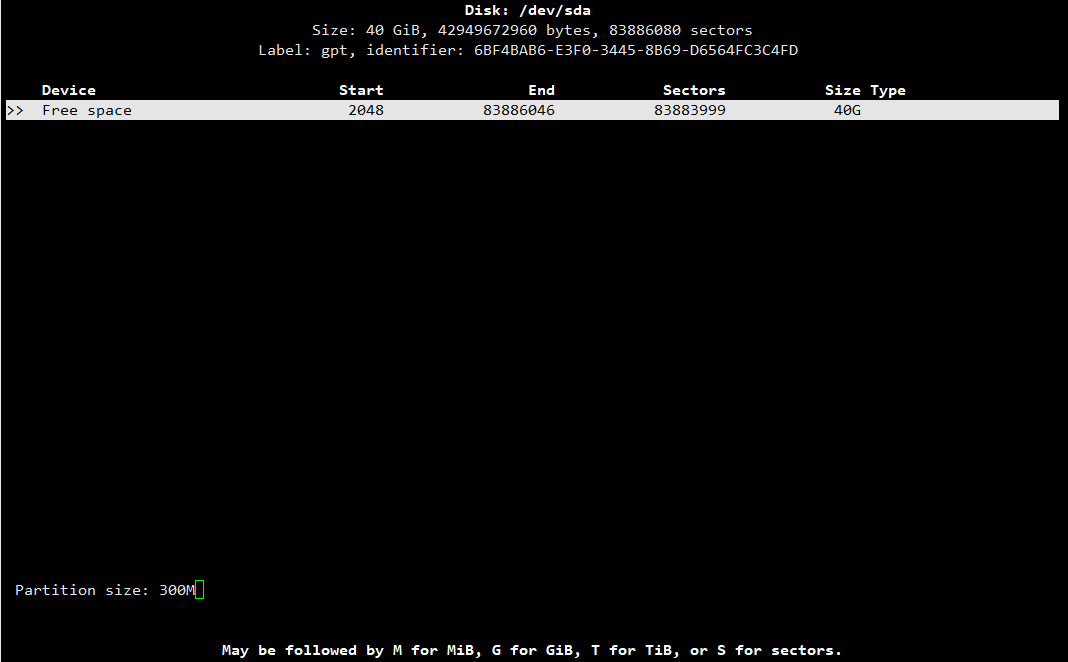
设置大小为300M,回车
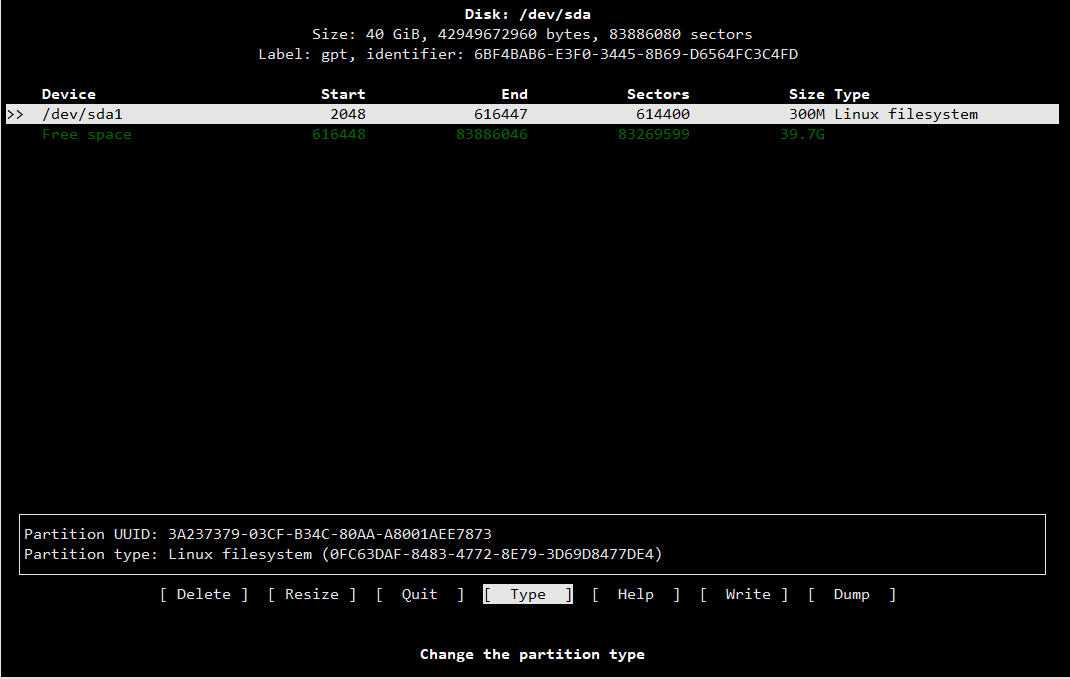
选择[ Type ],回车,选择 EFI System,回车
按向下的光标键,回到Free space,选择[ New ]继续分区,swap分区设4G,Type选择Linux swap。root分区默认剩余全部空间,Type选择Linux filesystem
分好区后选择[ Write ]写入配置,提示Are you sure you want to write the partition table to disk?时要手动输入yes再回车,这里直接敲回车不管用
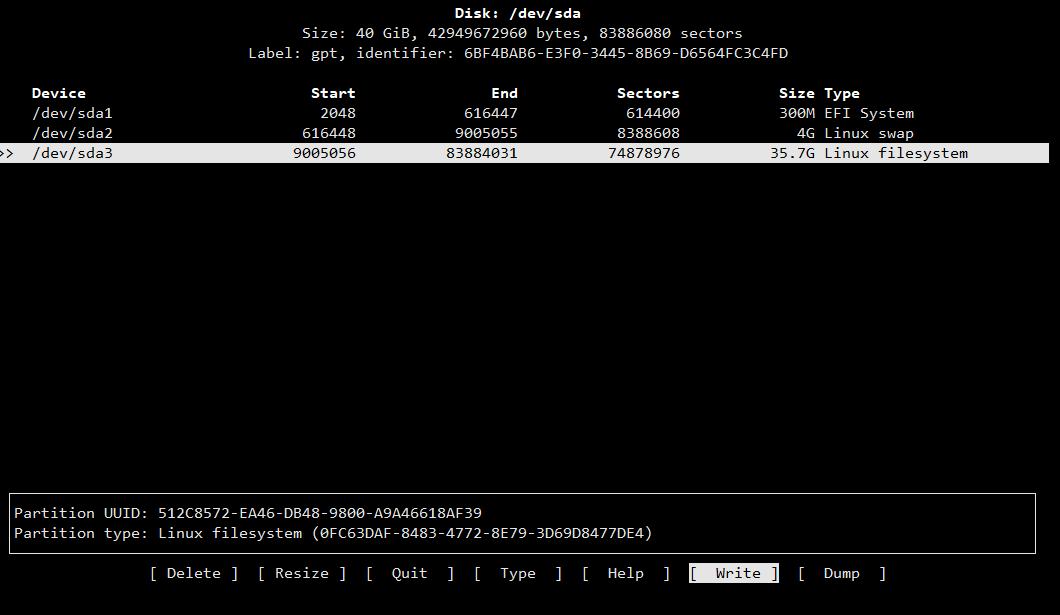
[ Write ]之后选择[ Quit ]退出
接下来依次对三个分区进行格式化
EFI分区格式化
mkfs.vfat /dev/sda1 root分区格式化,强制分区为xfs
mkfs.xfs -f /dev/sda3 创建swap分区
mkswap /dev/sda2 使用lsblk -f 查看磁盘分区情况

4. 挂载分区并安装系统
# 挂载分区 mount /dev/sda3 /mnt mkdir -p /mnt/boot/efi mount /dev/sda1 /mnt/boot/efi swapon /dev/sda2 #安装系统 pacstrap /mnt linux linux-firmware linux-headers base base-devel vim git bash-completion # 生成文件系统的表文件,作用是后面重启进去系统能自动挂载分区 genfstab -U /mnt >> /mnt/etc/fstab cat /mnt/etc/fstab 5. 进入新系统并配置
arch-chroot /mnt 前面把格式化好的分区已经挂载在iso启动系统的/mnt目录下,并在该目录下安装了系统,执行arch-chroot相当于从当前的启动系统进入到安装好的arch linux系统中。
进到安装好的系统之后,第一步还是配置国内源,方法跟前文中的一样,不再赘述。
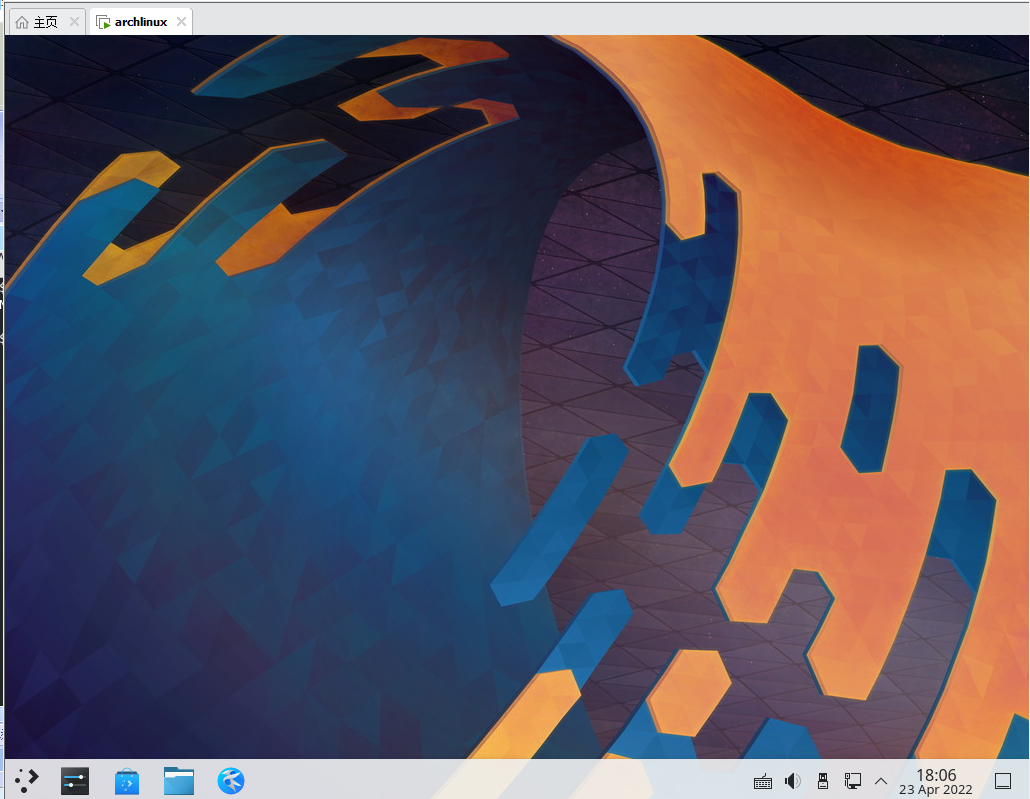
# 设置时区 ln -sf /usr/share/zoneinfo/Asia/Shanghai /etc/localtime hwclock --systohc # 设置系统语言 sed -i "s/#en_US.UTF-8 UTF-8/en_US.UTF-8 UTF-8/g" /etc/locale.gen sed -i "s/#zh_CN.UTF-8 UTF-8/zh_CN.UTF-8 UTF-8/g" /etc/locale.gen # 生成本地语言信息 locale-gen # 设置本地语言环境变量 echo "LANG=en_US.UTF-8" > /etc/locale.conf # 设置主机名,如archlinux echo "archlinux" > /etc/hostname # hosts文件中添加主机名 echo "127.0.0.1 localhost ::1 localhost 127.0.1.1 archlinux.localdomain archlinux" >> /etc/hosts # 安装以下软件包 pacman -S grub efibootmgr efivar networkmanager intel-ucode # 配置grub grub-install /dev/sda grub-mkconfig -o /boot/grub/grub.cfg # 激活启用NetworkManager systemctl enable NetworkManager # 给root创建密码 passwd # 安装openssl pacman -S openssh # 设置开机自启动 systemctl enable sshd # 修改/etc/ssh/sshd_config允许root登录,修改PermitRootLogin的值为yes sed -i "s/#PermitRootLogin prohibit-password/PermitRootLogin yes/g" /etc/ssh/sshd_config # 添加其他用户并设置密码,如test_user useradd --create-home test_user passwd test_user # 设置用户组 usermod -aG wheel,users,storage,power,lp,adm,optical test_user # 修改当前用户权限,编辑以下文件,取消%wheel ALL=(ALL) ALL前的注释,用:wq!保存退出 vim /etc/sudoers # 安装显卡驱动 pacman -S xf86-video-intel vulkan-intel mesa # 安装声卡驱动 pacman -S alsa-utils pulseaudio pulseaudio-bluetooth cups # 安装英文字体 pacman -S ttf-dejavu ttf-droid ttf-hack ttf-font-awesome otf-font-awesome ttf-lato ttf-liberation ttf-linux-libertine ttf-opensans ttf-roboto ttf-ubuntu-font-family # 安装中文字体 pacman -S ttf-hannom noto-fonts noto-fonts-extra noto-fonts-emoji noto-fonts-cjk adobe-source-code-pro-fonts adobe-source-sans-fonts adobe-source-serif-fonts adobe-source-han-sans-cn-fonts adobe-source-han-sans-hk-fonts adobe-source-han-sans-tw-fonts adobe-source-han-serif-cn-fonts wqy-zenhei wqy-microhei # 打开字体引擎,取消最后一句的注释 # export FREETYPE_PROPERTIES="truetype:interpreter-version=40" vim /etc/profile.d/freetype2.sh # 安装显示服务 pacman -S xorg # 安装桌面环境。plasma:就是桌面环境;sddm:登录管理器;konsole:kde下的终端;kate:文本编辑器;ark:解压与压缩;okular:PDF查看器;spectacle:截图工具;AUR:管理工具 pacman -S plasma sddm konsole dolphin kate ark okular spectacle yay # 设置sddm登录 systemctl enable sddm # 安装中文输入法 sudo pacman -S fcitx fcitx-im fcitx-configtool yay -S fcitx-sogoupinyin # 编辑 /root/.xprofile写入以下内容 export GTK_IM_MODULE=fcitx export QT_IM_MODULE=fcitx export XMODIFIERS="@im=fcitx" # 安装其他软件 sudo pacman -S typora netease-cloud-music yay -S baidunetdisk-electron visual-studio-code-bin google-chrome qv2ray # 清理缓存 pacman -Scc 6. 重启进入安装系统
以上的配置是从启动系统arch-chroot配置的,我们现在退出启动系统,重启进去安装配置好的系统。
接上一步,依次执行
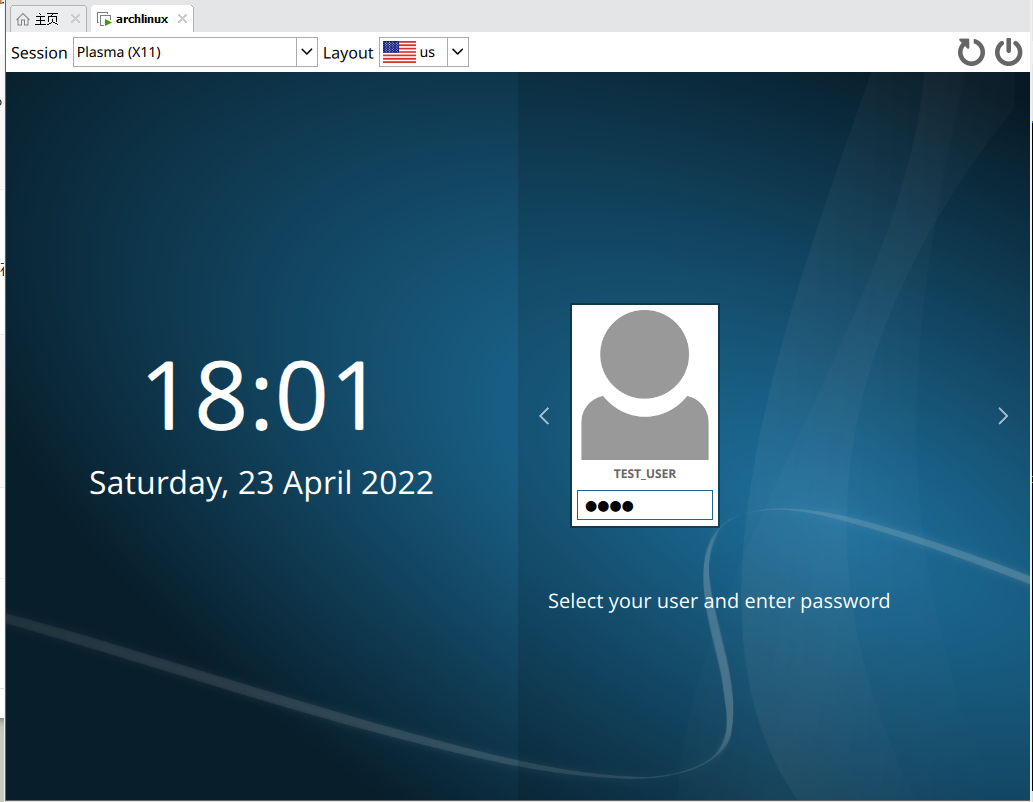
exit umount /mnt/boot/efi umount /mnt reboot 输入前面设置的密码登入系统