- A+
3.3、客户端编译生成GRPC类
1. 在“解决方案资源管理器”中,使用鼠标左键选中项目名称“Demo.Grpc.Cmd”,然后单击鼠标右键,在弹出的快捷菜单中选择“重新生成”菜单项。
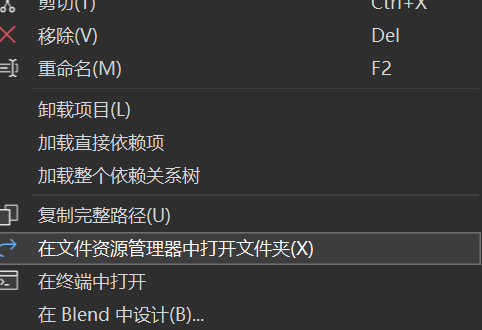
2. 在“解决方案资源管理器”中,使用鼠标左键选中项目名称“Demo.Grpc.Cmd,在弹出的快捷菜单中选择“在文件资源管理器中打开文件夹”菜单项。如下图。
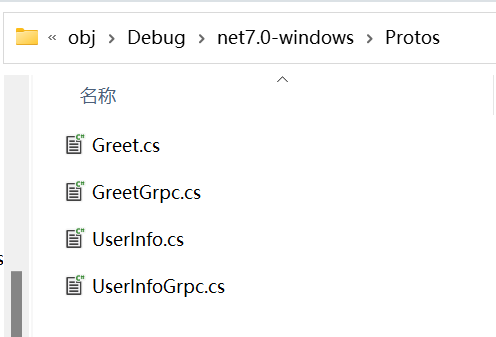
3.我们打开“文件资源管理器”,进入到Demo.Grpc.CmdobjDebug net7.0目录,发现此时目录下也有与服务端一样的4个.cs文件,就是GRPC协议文件对应的类文件,如下图所示:
3.4、gRPC服务的https调用
1.在服务端项目(Demo.GrpcService)中,由Visual Studio 2022在创建项目时默认配置了两个地址,让我们来调用。2个地址分别为:http://localhost:5209和https://localhost:7149, gRPC客户端会使用到这2个地址,目的是给客户端请求请求地址,服务端将监听这两个端口。
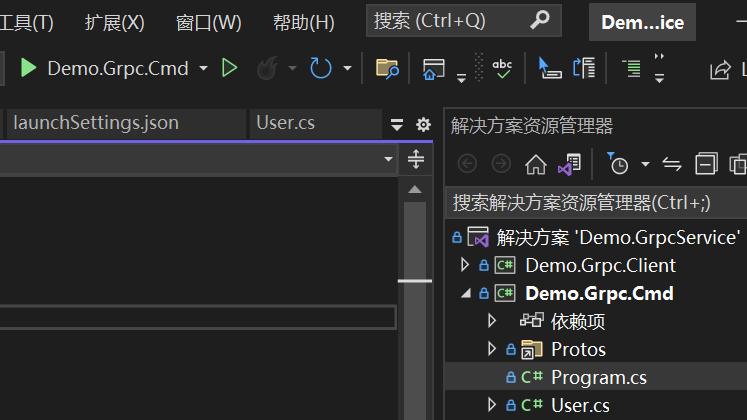
2. 在Visual Studio 2022的“解决方案资源管理器”中,使用鼠标右键单击“Demo.Grpc.Cmd”项目名称,在弹出菜单中选择“添加--> 类”。 在“添加新项”对话框中将类命名为 User,然后选择“添加”。
3. 在Visual Studio 2022的“解决方案资源管理器”中,使用鼠标双击打开刚才创建的User.cs文件,添加如下代码:
using System; using System.Collections.Generic; using System.Linq; using System.Text; using System.Text.Json; using System.Threading.Tasks; using Grpc.Net.Client; using Demo.GrpcService.Protos; namespace Demo.Grpc.Cmd { public class User { public void GetUserInfo() { // 使用https const string urlHttps = "https://localhost:7149"; using (var channel = GrpcChannel.ForAddress(urlHttps)) { var client = new UserInfo.UserInfoClient(channel); UserInfoResult userInfo = client.GetUserInfo(new UserInfoRequest() { UserName = "Admin", Password = "12345" }); //打印服务方法返回的结果 Console.WriteLine($"{userInfo.UserName},{userInfo.Age},{userInfo.Name}"); Console.WriteLine( JsonSerializer.Serialize(userInfo)); } // return string.Empty; Console.ReadKey(); } } }
4. 在Visual Studio 2022的“解决方案资源管理器”中,使用鼠标双击打开program.cs文件,添加如下代码:
/ 、See https://aka.ms/new-console-template for more information using Demo.Grpc.Cmd; Console.WriteLine("Hello, World!"); new User().GetUserInfo();
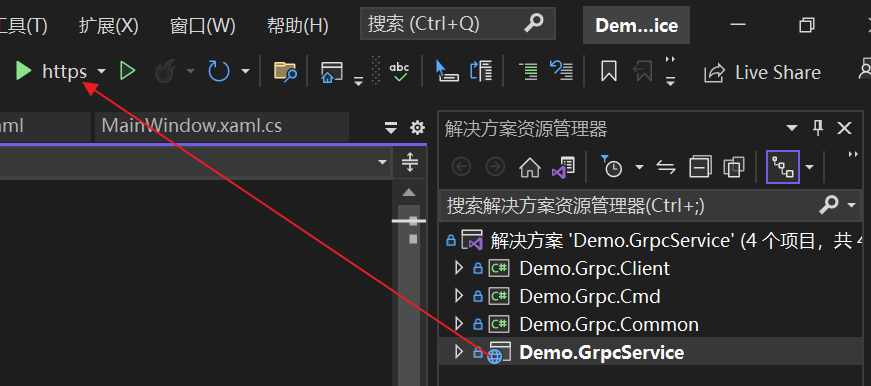
5.我们在开启一个Visual Studio 2022,打开“Demo.GrpcService”解决方案,将“Demo.GrpcService”设置为启动项目,并使用https协议启动运行。
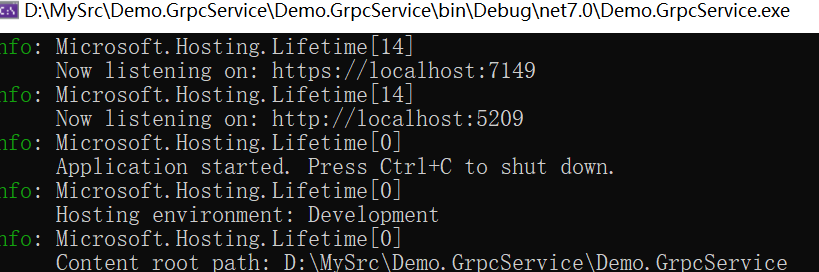
6.启动运行之后的结果如图。
7.我们切换到“Demo.Grpc.Cmd”为启动项目Visual Studio 2022,按F5,启动。

8.启动之后的运行结果,如图。

到此,调用gRPC服务端提供的https地址就成功了。
3.5、gRPC服务的http调用
相比https的调用,我们只需要在调用前加上如下代码即可:
|
|
AppContext.SetSwitch("System.Net.Http.SocketsHttpHandler.Http2UnencryptedSupport", true); |
1. 在Visual Studio 2022的“解决方案资源管理器”中,使用鼠标双击打开User.cs文件,添加如下代码:
using System; using System.Collections.Generic; using System.Linq; using System.Text; using System.Text.Json; using System.Threading.Tasks; using Grpc.Net.Client; using Demo.GrpcService.Protos; namespace Demo.Grpc.Cmd { public class User { public void GetUserInfo() { //使用http AppContext.SetSwitch("System.Net.Http.SocketsHttpHandler.Http2UnencryptedSupport", true); const string urlHttp = "http://localhost:5209"; using (var channel = GrpcChannel.ForAddress(urlHttp)) // 使用https // const string urlHttps = "https://localhost:7149"; // using (var channel = GrpcChannel.ForAddress(urlHttps)) { var client = new UserInfo.UserInfoClient(channel); UserInfoResult userInfo = client.GetUserInfo(new UserInfoRequest() { UserName = "Admin", Password = "12345" }); //打印服务方法返回的结果 Console.WriteLine($"{userInfo.UserName},{userInfo.Age},{userInfo.Name}"); Console.WriteLine( JsonSerializer.Serialize(userInfo)); } // return string.Empty; Console.ReadKey(); } } }
2.在目Visual Studio 2022,按F5或是点击工具栏上的“运行”按钮,启动“Demo.Grpc.Cmd”控制台程序。
到此,调用gRPC服务端提供的http地址就成功了。
运行效果如下: