- A+
近些年来,随着WPF在生产,制造,工业控制等领域应用越来越广发,很多企业对WPF开发的需求也逐渐增多,使得很多人看到潜在机会,不断从Web,WinForm开发转向了WPF开发,但是WPF开发也有很多新的概念及设计思想,如:数据驱动,数据绑定,依赖属性,命令,控件模板,数据模板,MVVM等,与传统WinForm,ASP.NET WebForm开发,有很大的差异,今天就以一个简单的小例子,简述WPF开发中MVVM设计思想及应用。

为什么要用MVVM?
传统的WinForm开发,一般采用事件驱动,即用户点击事件,触发对应的事件,并在事件中通过唯一标识符获取页面上用户输入的数据,然后进行业务逻辑处理。这样做会有一个弊端,就是用户输入(User Interface)和业务逻辑(Business)是紧密耦合在一起的,无法做到分离,随着项目的业务不断复杂化,这种高度耦合的弊端将会越来越明显。并且会出现分工不明确(如:后端工程师,前端UI),工作无法拆分的现象。所以分层(如:MVC,MVVM),可测试(Unit Test),前后端分离,就成为必须要面对的问题。而今天要讲解的MVVM设计模式,就非常好的解决了我们所面临的问题。
什么是MVVM?
MVVM即模型(Model)-视图(View)-视图模型(ViewModel) ,是用于解耦 UI 代码和非 UI 代码的 设计模式。 借助 MVVM,可以在 XAML 中以声明方式定义 UI,将 UI使用数据绑定标到包含数据和命令的其他层。 数据绑定提供数据和结构的松散耦合,使 UI 和链接的数据保持同步,同时可以将用户输入路由到相应的命令。具体如下图所示:

如上图所示:
- View(用户页面),主要用于向使用者展示信息,并接收用户输入的信息(数据绑定),及响应用户的操作(Command)。
- ViewModel(用户视图业务逻辑),主要处理客户请求,以及数据呈现。
- Model数据模型,作为存储数据的载体,是一个个的具体的模型类,通过ViewModel进行调用。但是在小型项目中,Model并不是必须的。
- IService(数据接口),数据访问服务,用于获取各种类型数据的服务。数据的形式有很多种,如网络数据,本地数据,数据库数据,但是在ViewModel调用时,都统一封装成了Service。在小型项目中,IService数据接口也并不是必须的,不属于MVVM的范畴。
- 在上图中,DataBase,Network,Local等表示不同的数据源形式,并不属于MVVM的范畴。
前提条件
要实现MVVM,首先需要满足两个条件:
- 属性变更通知,在MVVM思想中,由WinForm的事件驱动,转变成了数据驱动。在C#中,普通的属性,并不具备变更通知功能,要实现变更通知功能,必须要实现INotifyPropertyChanged接口。
- 绑定命令,在WPF中,为了解决事件响应功能之间的耦合,提出了绑定命令思想,即命令可以绑定的方式与控件建立联系。绑定命令必须实现ICommand接口。
在上述两个条件都满足后,如何将ViewModel中的具备变更通知的属性和命令,与View中的控件关联起来呢?答案就是绑定(Binding)。

当View层的数据控件和具备通知功能的属性进行Binding后,Binging就会自动侦听来自接口的PropertyChanged事件。进而达到数据驱动UI的效果,可谓【一桥飞架南北,天堑变通途】。
MVVM实例
为了进一步感受MVVM的设计思想,验证上述的理论知识,以实例进行说明。本实例的项目架构如下所示:

MVVM核心代码
1. 具备通知功能的属性
首先定义一个抽象类ObservableObject,此接口实现INotifyPropertyChanged接口,如下所示:
using System.ComponentModel; using System.Runtime.CompilerServices; namespace DemoMVVM.Core { /// <summary> /// 可被观测的类 /// </summary> public abstract class ObservableObject : INotifyPropertyChanged { /// <summary> /// 属性改变事件 /// </summary> public event PropertyChangedEventHandler? PropertyChanged; /// <summary> /// 属性改变触发方法 /// </summary> /// <param name="propertyName">属性名称</param> protected void RaisePropertyChanged([CallerMemberName]string propertyName=null) { PropertyChanged?.Invoke(this, new PropertyChangedEventArgs(propertyName)); } /// <summary> /// 设置属性值,如果发生改变,则调用通知方法 /// </summary> /// <typeparam name="T"></typeparam> /// <param name="target"></param> /// <param name="value"></param> /// <param name="propertyName"></param> /// <returns></returns> protected bool SetProperty<T>(ref T target,T value, [CallerMemberName] string propertyName = null) { if (EqualityComparer<T>.Default.Equals(target, value)) { return false; } else { target=value; RaisePropertyChanged(propertyName); return true; } } } }注意:上述SetProperty主要用于将普通属性,变为具备通知功能的属性。
然后定义一个ViewMode基类,继承自ObservableObject,以备后续扩展,如下所示:
namespace DemoMVVM.Core { /// <summary> /// ViewModel基类,继承自ObservableObject /// </summary> public abstract class ViewModelBase:ObservableObject { } }
2. 具备绑定功能的命令
首先定义一个DelegateCommand,实现ICommand接口,如下所示:
namespace DemoMVVM.Core { public class DelegateCommand : ICommand { private Action<object> execute; private Predicate<object> canExecute; public event EventHandler? CanExecuteChanged; public DelegateCommand(Action<object> execute, Predicate<object> canExecute) { if (execute == null) { throw new ArgumentNullException("execute 不能为空"); } this.execute = execute; this.canExecute = canExecute; } public DelegateCommand(Action<object> execute):this(execute,null) { } public bool CanExecute(object? parameter) { return canExecute?.Invoke(parameter)!=false; } public void Execute(object? parameter) { execute?.Invoke(parameter); } } }注意,DelegateCommand的构造函数,接收两个参数,一个是Execute(干活的),一个是CanExecute(判断是否可以干活的)。
MVVM应用代码
本实例主要实现两个数的运算。如加,减,乘,除等功能。
首先定义ViewModel,继承自ViewModelBase,主要实现具备通知功能的属性和命令,如下所示:
using DemoMVVM.Core; using System; using System.Collections.Generic; using System.Linq; using System.Runtime; using System.Text; using System.Threading.Tasks; namespace DemoMVVM { public class MainWindowViewModel:ViewModelBase { #region 属性及构造函数 private double leftNumber; public double LeftNumber { get { return leftNumber; } set { SetProperty(ref leftNumber , value); } } private double rightNumber; public double RightNumber { get { return rightNumber; } set { SetProperty(ref rightNumber , value); } } private double resultNumber; public double ResultNumber { get { return resultNumber; } set { SetProperty(ref resultNumber , value); } } public MainWindowViewModel() { } #endregion #region 命令 private DelegateCommand operationCommand; public DelegateCommand OperationCommand { get { if (operationCommand == null) { operationCommand = new DelegateCommand(Operate); } return operationCommand; } } private void Operate(object obj) { if(obj == null) { return; } var type=obj.ToString(); switch (type) { case "+": this.ResultNumber = this.LeftNumber + this.RightNumber; break; case "-": this.ResultNumber = this.LeftNumber - this.RightNumber; break; case "*": this.ResultNumber = this.LeftNumber * this.RightNumber; break; case "/": if (this.RightNumber == 0) { this.ResultNumber = 0; } else { this.ResultNumber = this.LeftNumber / this.RightNumber; } break; } } #endregion } }创建视图,并在视图中进行数据绑定,将ViewModel和UI关联起来,如下所示:
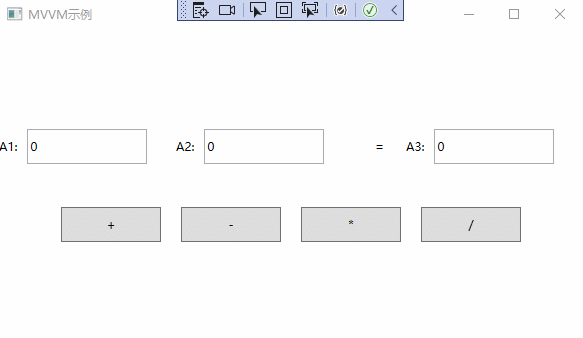
<Window x:Class="DemoMVVM.MainWindow" xmlns="http://schemas.microsoft.com/winfx/2006/xaml/presentation" xmlns:x="http://schemas.microsoft.com/winfx/2006/xaml" xmlns:d="http://schemas.microsoft.com/expression/blend/2008" xmlns:mc="http://schemas.openxmlformats.org/markup-compatibility/2006" xmlns:local="clr-namespace:DemoMVVM" mc:Ignorable="d" Title="MVVM示例" Height="350" Width="600"> <Grid> <Grid.ColumnDefinitions> <ColumnDefinition></ColumnDefinition> <ColumnDefinition></ColumnDefinition> <ColumnDefinition Width="0.3*"></ColumnDefinition> <ColumnDefinition></ColumnDefinition> </Grid.ColumnDefinitions> <Grid.RowDefinitions> <RowDefinition></RowDefinition> <RowDefinition></RowDefinition> <RowDefinition></RowDefinition> <RowDefinition></RowDefinition> </Grid.RowDefinitions> <StackPanel Grid.Row="1" Grid.Column="0" Orientation="Horizontal"> <TextBlock Text="A1:" VerticalAlignment="Center" ></TextBlock> <TextBox Margin="10" Width="120" Height="35" Text="{Binding LeftNumber, UpdateSourceTrigger=PropertyChanged}" VerticalContentAlignment="Center"></TextBox> </StackPanel> <StackPanel Grid.Row="1" Grid.Column="1" Orientation="Horizontal"> <TextBlock Text="A2:" VerticalAlignment="Center" ></TextBlock> <TextBox Margin="10" Width="120" Height="35" Text="{Binding RightNumber, UpdateSourceTrigger=PropertyChanged}" VerticalContentAlignment="Center"></TextBox> </StackPanel> <TextBlock Grid.Row="1" Grid.Column="2" Text="=" VerticalAlignment="Center" HorizontalAlignment="Center"></TextBlock> <StackPanel Grid.Row="1" Grid.Column="3" Orientation="Horizontal"> <TextBlock Text="A3:" VerticalAlignment="Center" ></TextBlock> <TextBox Margin="10" Width="120" Height="35" Text="{Binding ResultNumber, UpdateSourceTrigger=PropertyChanged}" VerticalContentAlignment="Center"></TextBox> </StackPanel> <StackPanel Grid.Row="2" Grid.ColumnSpan="4" Orientation="Horizontal" HorizontalAlignment="Center"> <Button Content="+" Width="100" Height="35" Margin="10" Command="{Binding OperationCommand}" CommandParameter="+"></Button> <Button Content="-" Width="100" Height="35" Margin="10" Command="{Binding OperationCommand}" CommandParameter="-"></Button> <Button Content="*" Width="100" Height="35" Margin="10" Command="{Binding OperationCommand}" CommandParameter="*"></Button> <Button Content="/" Width="100" Height="35" Margin="10" Command="{Binding OperationCommand}" CommandParameter="/"></Button> </StackPanel> </Grid> </Window>注意,在xaml前端UI代码中,分别对TextBox的Text和Button的Command进行了绑定,已达到数据驱动UI,以及UI响应客户的功能。
在UI的构造函数中,将DataContext数据上下文和ViewModel进行关联,如下所示:
namespace DemoMVVM { /// <summary> /// Interaction logic for MainWindow.xaml /// </summary> public partial class MainWindow : Window { private MainWindowViewModel viewModel; public MainWindow() { InitializeComponent(); viewModel = new MainWindowViewModel(); this.DataContext = viewModel; } } }
MVVM实例演示
通过以上步骤,已经完成了MVVM的简单应用。实例演示如下:
以上就是深入理解WPF中MVVM的设计思想的全部内容。希望可以抛砖引玉,一起学习,共同进步。