- A+
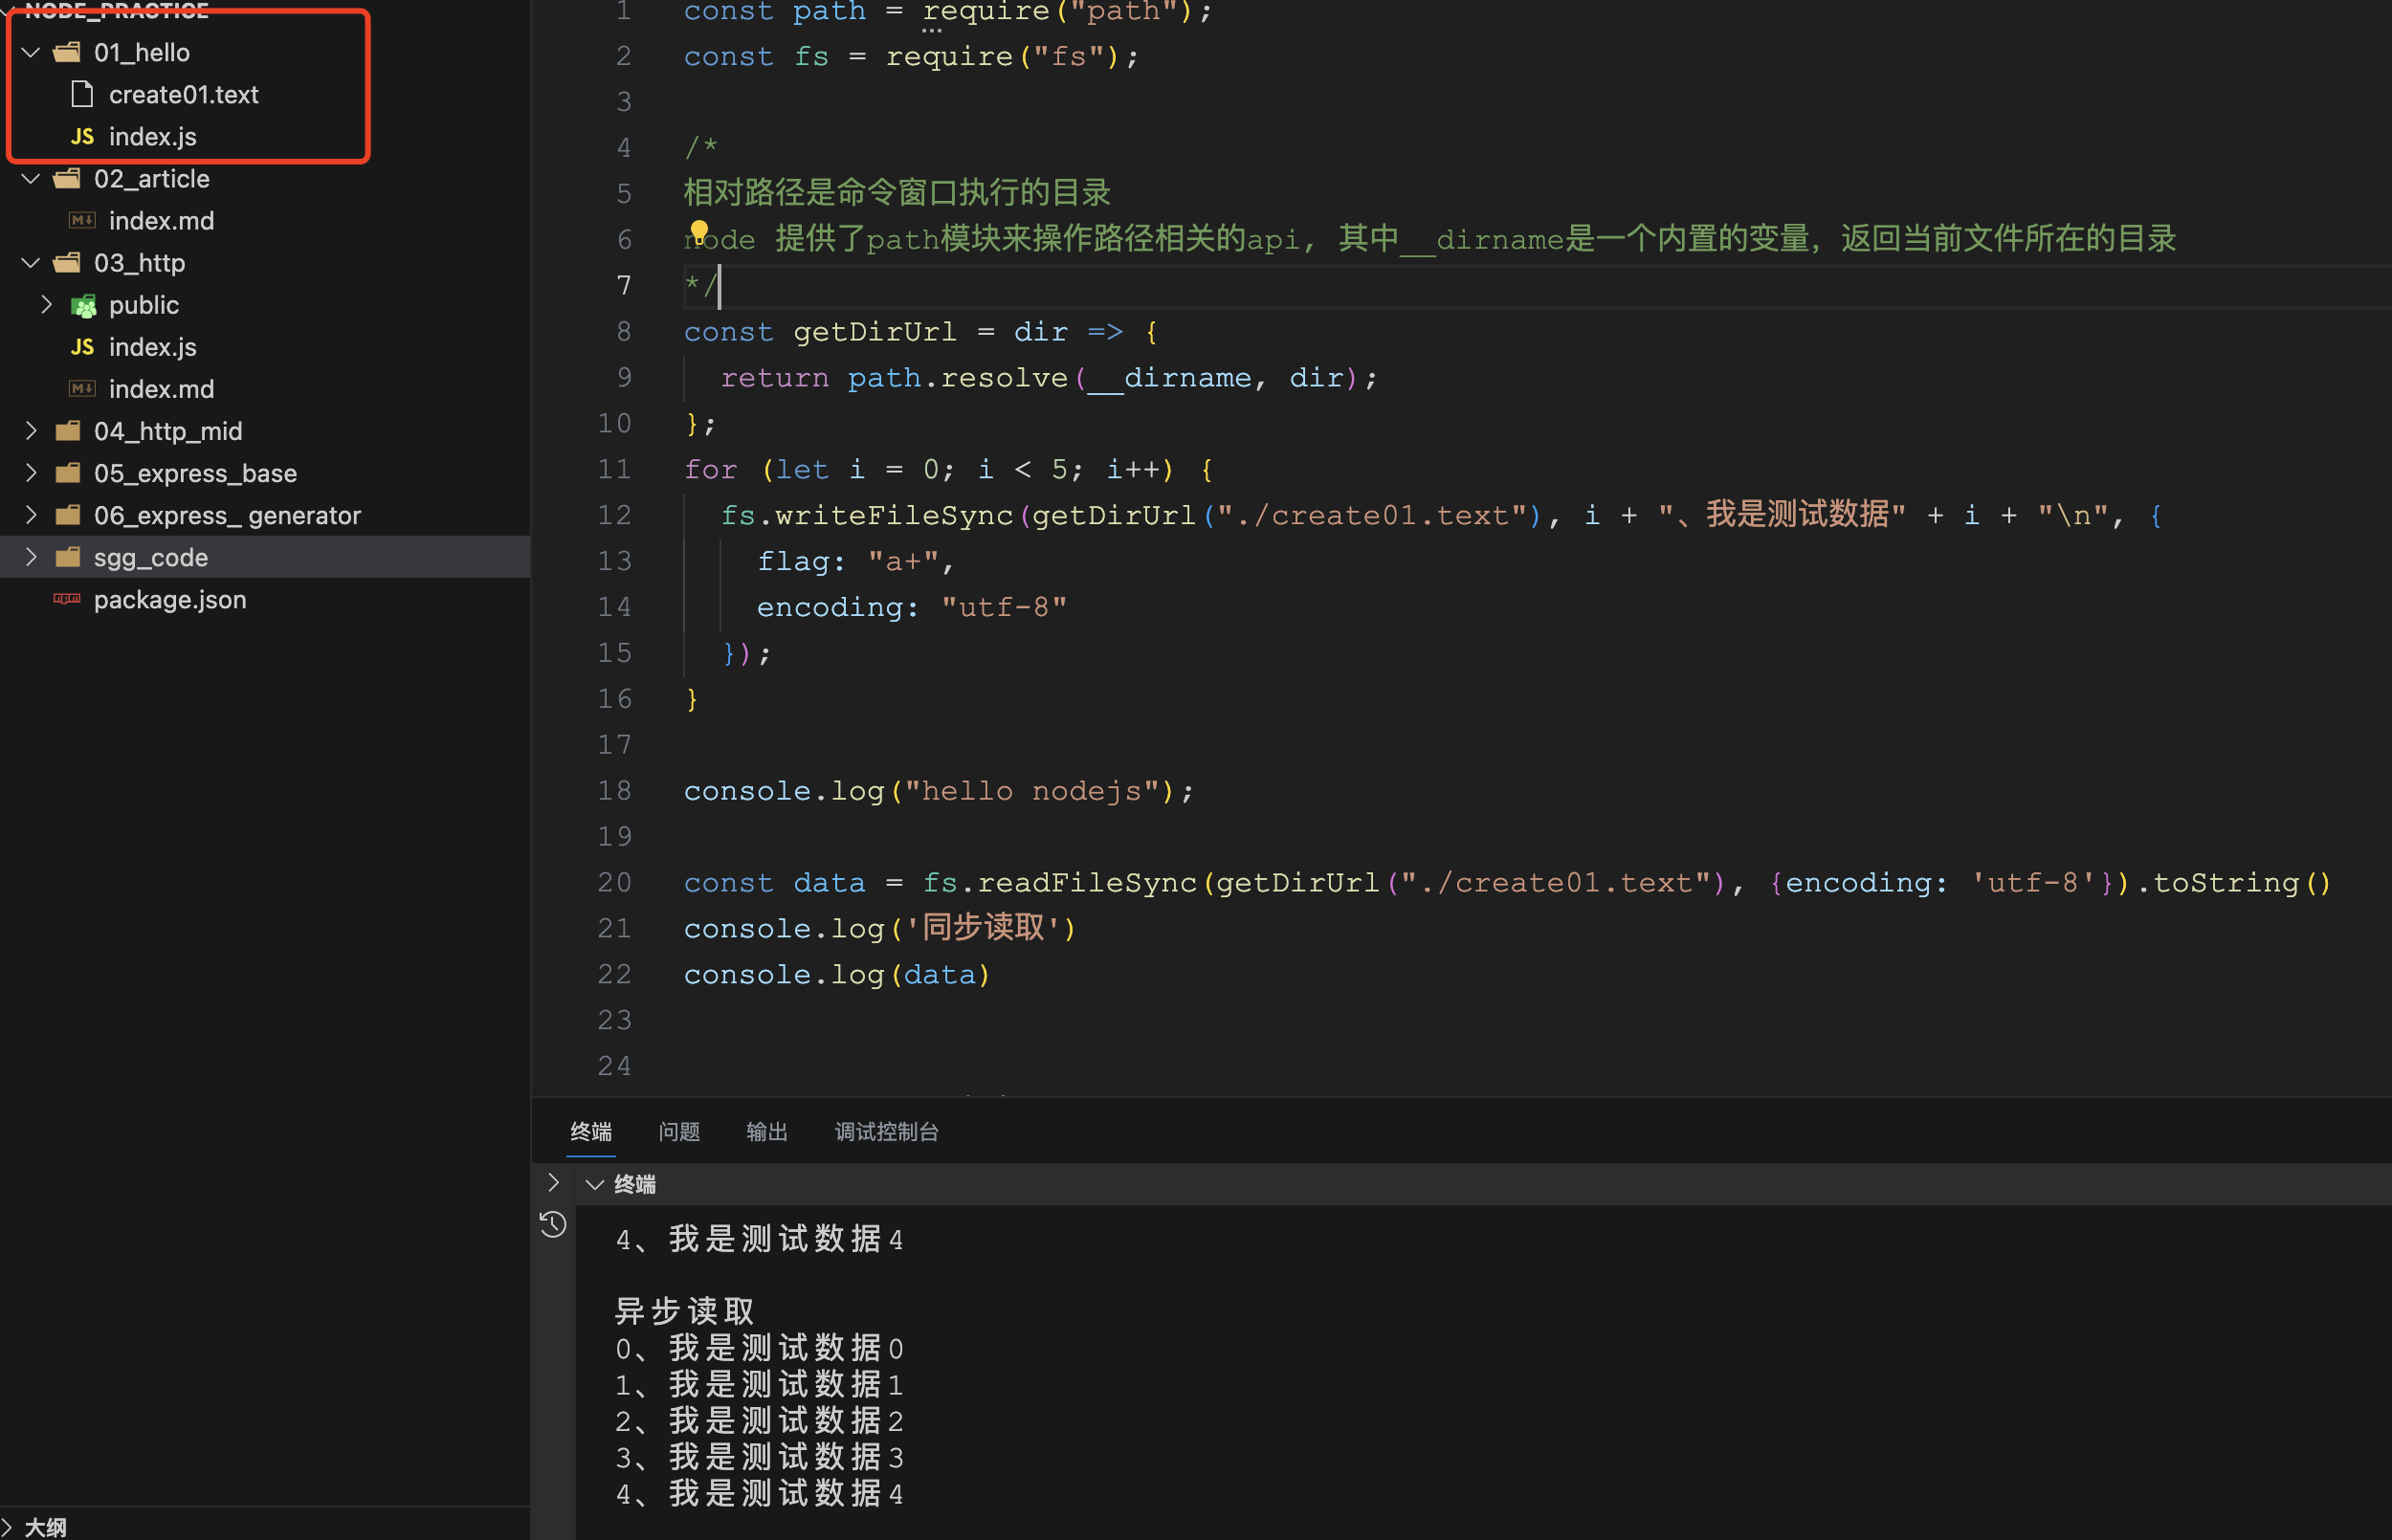
操作fs模块
const path = require("path"); const fs = require("fs"); /* 相对路径是命令窗口执行的目录 node 提供了path模块来操作路径相关的api, 其中__dirname是一个内置的变量,返回当前文件所在的目录 */ const getDirUrl = dir => { return path.resolve(__dirname, dir); }; for (let i = 0; i < 5; i++) { fs.writeFileSync(getDirUrl("./create01.text"), i + "、我是测试数据" + i + "n", { flag: "a+", encoding: "utf-8" }); } console.log("hello nodejs"); const data = fs.readFileSync(getDirUrl("./create01.text"), {encoding: 'utf-8'}).toString() console.log('同步读取') console.log(data) console.log('异步读取') fs.readFile(getDirUrl("./create01.text"), (err, data) => { if(!err) { console.log(data.toString()); } else { console.error(err); } });在窗口执行对应的目录即可,我这里是:
操作http模块
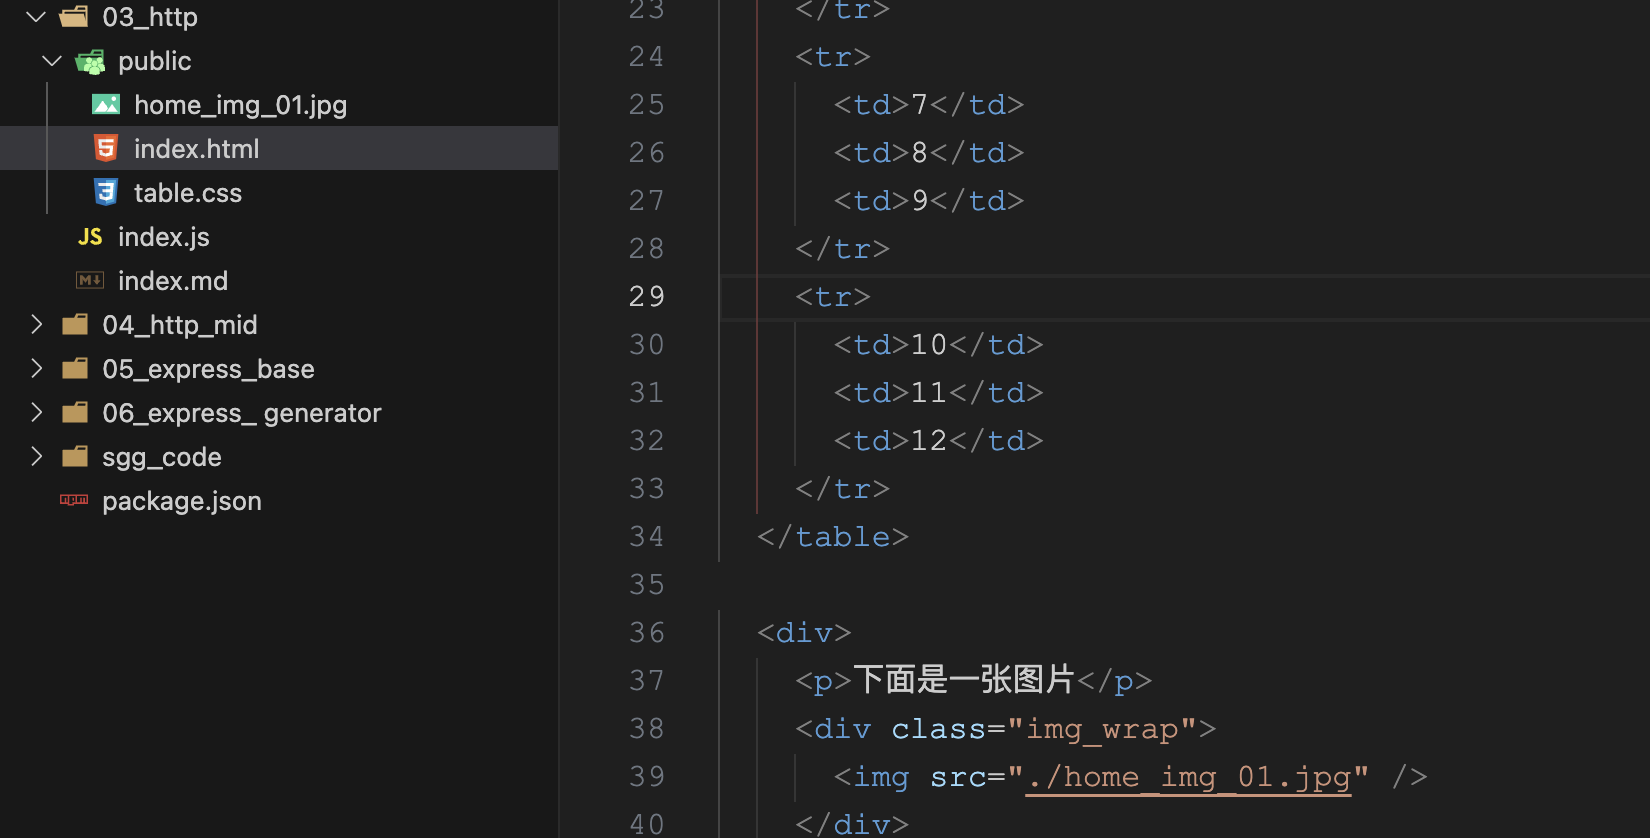
// 1. 导入http模块 const http = require("http"); const fs = require("fs"); const path = require("path"); const mimes = { html: "text/html", css: "text/css", js: "text/javascript", png: "image/png", jpg: "image/jpeg", gif: "image/gif", mp4: "video/mp4", mp3: "audio/mpeg", json: "application/json" }; //2. 创建服务对象 create 创建 server 服务 // request 意为请求. 是对请求报文的封装对象, 通过 request 对象可以获得请求报文的数据 // response 意为响应. 是对响应报文的封装对象, 通过 response 对象可以设置响应报文 const server = http.createServer((req, res) => { let { url, method } = req; // 文件夹路径 const rootDir = __dirname + "/public"; let filePath = rootDir + url; if (!fs.existsSync(filePath)) { return } // 读取内容 fs.readFile(filePath, (err, data) => { if (err) { console.log(err); //设置字符集 res.setHeader('content-type','text/html;charset=utf-8'); //判断错误的代号 switch(err.code){ case 'ENOENT': res.statusCode = 404; res.end('<h1>404 Not Found</h1>'); case 'EPERM': res.statusCode = 403; res.end('<h1>403 Forbidden</h1>'); default: res.statusCode = 500; res.end('<h1>500 Internal Server Error</h1>'); } return; } //获取文件的后缀名 let ext = path.extname(filePath).slice(1); //获取对应的类型 let type = mimes[ext]; if(type){ if(ext === 'html'){ res.setHeader('content-type', type + ';charset=utf-8'); }else{ res.setHeader('content-type', type); } }else{ //没有匹配到-默认设置二进制文件类型 res.setHeader('content-type', 'application/octet-stream'); } //响应文件内容 res.end(data); }); }); //3. 监听端口, 启动服务 server.listen(9000, () => { console.log("服务已经启动,9000端口监听中..."); });如上最简单的http 服务起来了,在浏览器中 输入 http://localhost:9000/index.html 得到如下页面

通过匹配后缀,在public文件中返回对应的资源,代码结构如下
都是一些很简单的代码就不贴了,如果需要留下邮箱即可。
其他模块看看官网的文档即可,不在记录。
框架
上面都是通过原始的方式来使用node,其实node的生态也很丰富,有很多的框架让我们选择,如 express、koa2、nestjs、midwayjs 等等
express 基本使用
// 1.0 导入express const express = require('express') // 2.0 express 实例 const app = express() const port = 9000 // 3.0 路由 app.get('/', (req, res) => { res.send('基本使用 Hello World!') }) // 启动服务 app.listen(port, () => { console.log(`启动服务,端口: ${port}`) })通常我们使用脚手架,这样可以得到统一的项目结构 如 express_ generator,具体查看express 官网
中间件-洋葱模型
目前比较流行的 nodejs http 服务框架使用拦截器模式,这种模式将 http 请求响应的过程分为若干切面,每个切面上进行一项或若干项关联的操作。比如说,我们可以通过不同的拦截切面处理用户信息验证、会话(session)验证、表单数据验证、query 解析,或者业务逻辑处理等等。这种架构设计让切面与切面之间彼此独立。
有点面向切面编程的概念,不知道对不对。
手动实现一个拦截器:实现类似如下效果
async (ctx, next) => { do sth... }通过调用next 执行下一个函数,可以中途return退出,也可以继续调用next直到最后一个函数,然后在一层一层的返回,洋葱的结构跟这个类似,所以叫洋葱模型。
这里的中间件其实是一个函数,在外层使用use 注入进来。
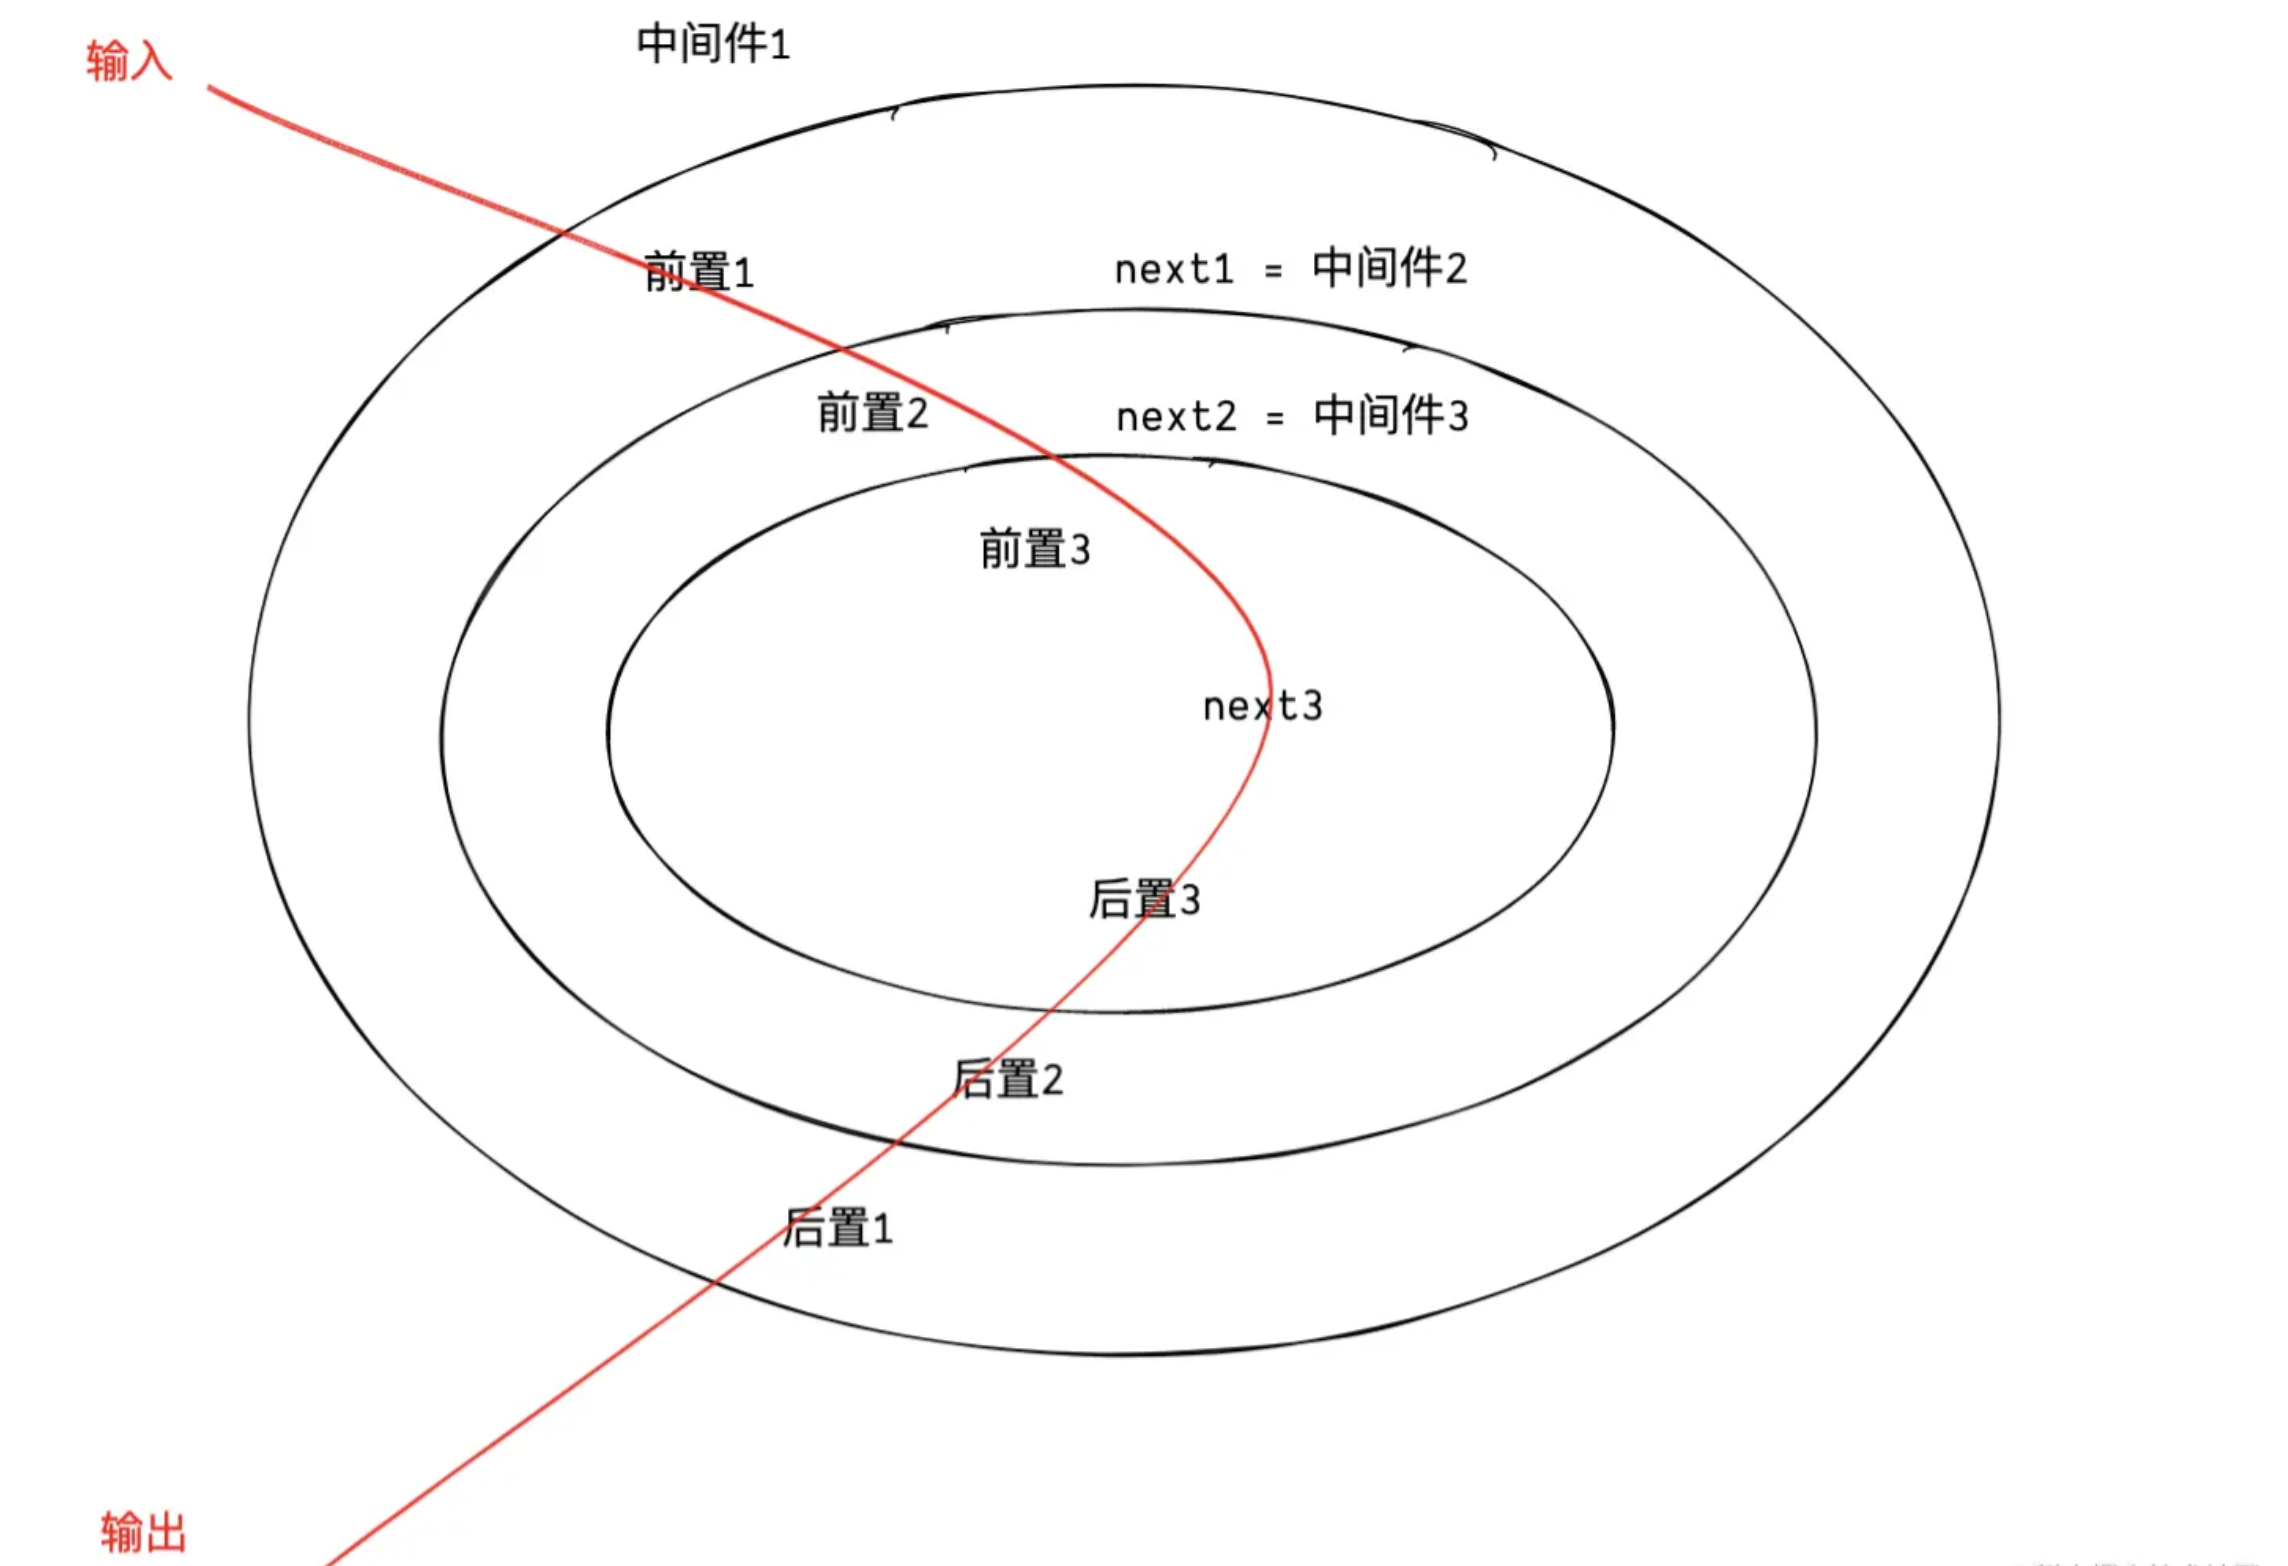
next 语句后面的代码,然后继续上一个中间件的next后置语句,继续重复上述逻辑,直至执行第一个中间件的next后置语句,最后输出,这个执行的机制,称为洋葱模型。模拟洋葱模型
洋葱模型关键在于怎么处理next 参数,next是下一个函数的引用, ,可以通过我们索引加闭包,或者累加器的形式来处理,为了方便直接使用累加器的形式即可,如下代码:
/* 这个思路通过利用累加器函数的特性,返回一个函数 */ class Interceptor { aspects = []; use (fn) { this.aspects.push(fn) return this } async run (context) { // 从右往左开始遍历 const proc = this.aspects.reduceRight( function (a, b) { let flag = false return async () => { // a 上一个fn,也就是调用的时传入的 next if (flag) { return } flag = true await b(context, a) } },() => Promise.resolve()) try { // 通过这个reduceRight 让函数串起来了 await proc() } catch (e) { console.error(e); } } } // 测试 const inter = new Interceptor() inter.use(function a(context, next) { console.log("a"); next(); console.log("a_after"); }); inter.use(function b(context, next) { console.log("b"); next(); console.log("b_after"); }); inter.use(function c(context, next) { console.log("c"); next(); console.log("c_after"); }); inter.use(function d(context, next) { console.log("d"); next(); console.log("d_after"); }); inter.run();输出a、b、c、d、d_after、c_after、b_after、a_after 其中koa2 源码中使用了索引加闭包的形式来处理 源码

小结
理解了nodejs 写起来还是挺顺手的,官网文档也还好。至于其他如sql、路由、保持会话状态等后台基本知识点,看看相关文档即可,并没有什么难度。
nodejs 入门基本也结束了。


