- A+
主题 2 Shell工具和脚本
Shell 工具和脚本 · the missing semester of your cs education (missing-semester-cn.github.io)
Shell脚本
shell 脚本是一种更加复杂度的工具。
- 定义变量
在bash中为变量赋值的语法是foo=bar,意为定义变量foo,foo的值为bar。访问变量使用$变量名
[lighthouse@VM-8-17-centos tools]$ foo=bar [lighthouse@VM-8-17-centos tools]$ echo "$foo" bar 需要注意的是,Shell中使用空格作为分隔参数的保留字符。
如果将上诉赋值语句写为foo = bar,将不起作用。事实上,这样写并没有将bar赋给foo,而是用=和bar作为参数调用foo程序。因为这样Shell会认为你正在执行一个名为foo的命令。
[lighthouse@VM-8-17-centos tools]$ foo = bar -bash: foo: command not found 你需要特别注意这类问题,比如如果有带空格的文件名,你需要使用引号将其括起来。
- 在bash中处理字符串
有两种定义字符串的方法,可以使用双引号定义字符串,也可以使用单引号定义字符串。
[lighthouse@VM-8-17-centos tools]$ echo "Hello" Hello [lighthouse@VM-8-17-centos tools]$ echo 'Hello' Hello Bash中的字符串通过' 和 "分隔符来定义,但是它们的含义并不相同。
以'定义的字符串为原义字符串,其中的变量不会被转义,而 "定义的字符串会将变量值进行替换。
例如:
[lighthouse@VM-8-17-centos tools]$ echo "Value is $foo" Value is bar [lighthouse@VM-8-17-centos tools]$ echo 'Value is $foo' Value is $foo - 定义函数
和其他大多数的编程语言一样,bash也支持if, case, while 和 for 这些控制流关键字。同样地, bash 也支持函数,它可以接受参数并基于参数进行操作。
下面这个函数是一个例子,它会创建一个文件夹并使用cd进入该文件夹。
[lighthouse@VM-8-17-centos tools]$ cat mcd.sh mcd(){ mkdir -p "$1" cd "$1" } 这里
$1是脚本的第一个参数的意思
source 脚本名,这将会在Shell中加载脚本并运行。
[lighthouse@VM-8-17-centos tools]$ source mcd.sh [lighthouse@VM-8-17-centos tools]$ mcd test [lighthouse@VM-8-17-centos test]$ 如上,在执行了source mcd.sh之后,看似无事发生,但实际上Shel中已经定义了mcd函数。我们给mcd传递一个参数test,这个参数被用于作为创建的目录名(即$1),然后Shell自动切换到了test目录里。整个过程就是,我们创建了文件夹并进入其中。
- 保留字
在bash中,许多$开头的东西一般都是被保留的(指留作特定用途)
$1 是脚本的第一个参数的意思。与其他脚本语言不同的是,bash使用了很多特殊的变量来表示参数、错误代码和相关变量。下面列举其中一些变量,更完整的列表可以参考 这里。
| 形式 | 释义 |
|---|---|
| $0 | 脚本名 |
| $1~$9 | 脚本的参数, $1 是第一个参数,依此类推 |
| $@ | 所有参数 |
| $# | 参数个数 |
| $? | 前一个命令的返回值 |
| $$ | 当前脚本的进程识别码 |
| !! | 完整的上一条命令,包括参数。常见应用:当你因为权限不足执行命令失败时,可以使用 sudo !!再尝试一次。 |
| $_ | 上一条命令的最后一个参数,如果你正在使用的是交互式 shell,你可以通过按下 Esc 之后键入 . 来获取这个值。 |
有一些保留字可以直接在Shell中使用,例如$?可以获取上一条命令的错误代码(返回值),再比如$_会返回上一条命令的最后一个参数。
例如:
[lighthouse@VM-8-17-centos tools]$ mkdir test [lighthouse@VM-8-17-centos tools]$ cd $_ [lighthouse@VM-8-17-centos test]$ 如上,我们无需在写一次test,使用$_访问该参数,它就会被替换成test,现在我们进入到test目录中了。
这样的例子有很多,再例如!!,它返回完整的上一条命令,包括参数。常见应用:当你因为权限不足执行命令失败时,可以使用 sudo !!再尝试一次。
[lighthouse@VM-8-17-centos tools]$ mkdir /mnt/new mkdir: cannot create directory ‘/mnt/new’: Permission denied [lighthouse@VM-8-17-centos tools]$ sudo !! sudo mkdir /mnt/new [lighthouse@VM-8-17-centos tools]$ rmdir /mnt/new rmdir: failed to remove '/mnt/new': Permission denied [lighthouse@VM-8-17-centos tools]$ sudo !! sudo rmdir /mnt/new [lighthouse@VM-8-17-centos tools]$ - 标准错误流
如果你的程序出错了,你想输出错误但不想污染标准输出,那么你可以写进这个流。
- 错误代码
还有一种叫做错误代码$?(error code)的东西,是一种告诉你整个运行过程结果如何的方式。
[lighthouse@VM-8-17-centos tools]$ echo "Hello" Hello [lighthouse@VM-8-17-centos tools]$ echo $? 0 这里显示echo "Hello" 运行的错误代码为0,0是因为一切正常,没有出现问题。
这种退出码和如C语言里代表的意思一样。
0代表一切正常,没有出现错误。
[lighthouse@VM-8-17-centos tools]$ grep foobar mcd.sh [lighthouse@VM-8-17-centos tools]$ echo $? 1 如上,我们尝试着在mcd.sh脚本中查找foobar字符串,而它不存在,所以grep什么都没输出。但是通过反馈一个1的错误代码,它让我们知道这件事没有成功。
此外,true的错误代码始终是0;false的错误代码则是1。
[lighthouse@VM-8-17-centos tools]$ true [lighthouse@VM-8-17-centos tools]$ echo $? 0 [lighthouse@VM-8-17-centos tools]$ false [lighthouse@VM-8-17-centos tools]$ echo $? 1 - 逻辑运算符
下面bash要做的是执行第一个命令,如果第一个命令失败,再去执行第二个(短路运算法则)。因为它尝试做一个逻辑或,如果第一个命令没有0错误码,就会去执行第二个命令
[lighthouse@VM-8-17-centos tools]$ false || echo "Oops fail" Oops fail 相似地,如果我们把false换成true,那么将不会执行第二个命令,因为第一个命令已经返回一个0错误码了,第二个命令将会被短路。
[lighthouse@VM-8-17-centos tools]$ true || echo "Oops fail" [lighthouse@VM-8-17-centos tools]$ 相似的,我们使用与运算符&&,它仅当第一个命令执行无错误时,才会执行第二个部分。如果第一个命令失败,那么第二个命令就不会被执行。
[lighthouse@VM-8-17-centos tools]$ true && echo "Things went well" Things went well [lighthouse@VM-8-17-centos tools]$ false && echo "This will not print" [lighthouse@VM-8-17-centos tools]$ 使用;号连接的代码,无论你执行什么,都可以通过。在同一行使用分号来连接命令,如下,它始终会被打印出来。
[lighthouse@VM-8-17-centos tools]$ false ; echo "This will always print" This will always print - 把命令的输出存到变量里
这里我们获取pwd命令的输出,它会打印出我们当前的工作路径,然后把其存入foo变量中。然后我们询问变量foo的值,我们就可以看到这个字符串
[lighthouse@VM-8-17-centos tools]$ foo=$(pwd) [lighthouse@VM-8-17-centos tools]$ echo $foo /home/lighthouse/missing-semester/tools 更广泛地来说,我们可以通过一个叫做命令替换的东西,把它放进任意字符串中。并且因为我们使用的不是单引号,所以这串东西会被展开。
[lighthouse@VM-8-17-centos tools]$ echo "We are in $(pwd)" We are in /home/lighthouse/missing-semester/tools - 过程替换
另一个比较好用知名度更低的东西叫做过程替换。和之前的命令替换是类似的,例如
[lighthouse@VM-8-17-centos tools]$ cat <(ls) <(ls ..) mcd.sh test tools 如上,<(ls) <(ls ..)的作用是,()内部的命令会被执行,其输出将被存储到一个临时文件内,然后把文件的标识符handle交给最左边的命令。
因此,这里我们在ls这个目录,把输出放到临时文件内,再对父目录如法炮制,然后把两个文件连接。
这种写法非常方便,因为有些命令会从某个文件的内容,而不是从标准输入里,获得输入参数
综合案例:
现在来看一个里面包含这些内容的简单示例脚本:
example.sh
#!/bin/bash echo "Start program at $(date)" # Date will be substituted echo "Running program $0 with $# arguments with pid $$" for file in "$@";do grep foobar "$file" > /dev/null 2> /dev/null # When pattern is not found,grep has exit status # We redirect STDOUT and STDERR to a null register .. if [[ "$?" -ne 0 ]]; then echo "File $file does not have any foobar, adding one" echo "# foobar" >> "$file" fi done 第三行:有一个$(date)的参数,date打印出当前的时间。
第五行:$0代表着当前运行的脚本的名称,$#代表给定的参数个数,$$是这个命令的进程ID,一般缩写为PID。
第七行:$@可以展开成所有参数,比如有三个参数,你可以键入$1 $2 $3,如果你不知道有多少个参数,也可以直接键入$@。这里我们通过这种方式将所有参数放在这里,然后这些参数被传给for循环,for循环会创建一个file变量,依次地用这些参数赋值给file变量。
第八行:我们运行grep命令,它会在一堆文件里搜索一个子串。这里我们在文件里搜索字符串foobar,文件变量file将会展开为赋给它的值。
之前说过,如果我们在意程序的输出的话,我们可以把它重定向到某处(比如到一个文件里面保存下来,或者连接组合)。但有时候情况恰恰相反,例如有时候我们只想知道某个脚本的错误代码是什么,例如这里想知道grep能不能成功查找。我们并不在意程序的运行结果,因此我们甚至能直接扔掉整个输出,包括标准输出和标准错误流。这里我们做的就是把两个输出重定向到/dev/null,/dev/null是UNIX系统的一种特殊设备,输入到它的内容会被丢弃(就是说你可以随意乱写乱画,然后所有的内容都会被丢掉)。
这里的>代表重定向输出流,2>代表重定向标准错误流(因为这两个流是分立的,所以你要告诉bash去操作哪一个)。
所以这里我们执行命令,去检查文件有没有foobar字符串,如果有的话,返回一个0错误代码,如果没有返回一个非0错误代码。
第十一行:我们获取前一个命令的错误代码($?),然后是一个比较运算符-ne(代表不等于Non Equal)
其他编程序语言中有像=和≠,bash里有很多预设的比较运算(可以使用命令
man test查看),这主要是为了你用Shell的时候,有很多东西要去测试。比如我们现在正在对比两个数,看它们是否相同。
如果文件中没有foobar,前一个命令将会返回一个非零错误代码。
第十二行:我们将会如果前一个命令返回一个非0错误代码,我们将会输出一句话File xxx does not have any foobar, adding one
第十三行:使用>>往对应文件中追加一行注释# foobar
现在我们来运行这个脚本,当前目录下有一些文件,我们将这些文件作为参数传给example.sh,检查是否有foobar。
[lighthouse@VM-8-17-centos tools]$ ls example.sh hello.txt mcd.sh [lighthouse@VM-8-17-centos tools]$ ./example.sh hello.txt mcd.sh Start program at Sun Dec 25 23:06:13 CST 2022 Running program ./example.sh with 2 arguments with pid 2570038 File hello.txt does not have any foobar, adding one File mcd.sh does not have any foobar, adding one 我们在文件hello.txt和mcd.sh中没有找到foobar字符串,因此脚本分别给这两个文件添加了一个# foobar 注释
[lighthouse@VM-8-17-centos tools]$ cat hello.txt hello,this is a txt file # foobar [lighthouse@VM-8-17-centos tools]$ cat mcd.sh mcd(){ mkdir -p "$1" cd "$1" } # foobar - 通配符
如果我们不想一个一个查找文件,可以使用通配符来进行匹配。
比如这里*匹配任意字符,这里将会显示出所有含有任意字符,并以.sh结尾的文件
[lighthouse@VM-8-17-centos tools]$ ls example.sh hello.txt image.png mcd.sh project1 project2 test [lighthouse@VM-8-17-centos tools]$ ls *.sh example.sh mcd.sh 现在如果我只想找有一个而不是两个特定字符的项,可以使用?,?匹配一个字符
[lighthouse@VM-8-17-centos tools]$ ls example.sh hello.txt image.png mcd.sh project1 project2 project42 test [lighthouse@VM-8-17-centos tools]$ ls project? project1: src project2: src 现在我们得到了匹配的目录project1和project2
src是匹配的目录下的子项
总而言之,通配符非常强大,你也可以组合它们。
一个常用模式是花括号{}。
比如目录下有一个image.png图片,我们想转变该图像的格式,一般的做法是convert image.png image.jpg,但是你也可以键入convert image.{png,jpg},它会展开成上面的那行。
又如:
[lighthouse@VM-8-17-centos tools]$ touch foo{,1,2,10} [lighthouse@VM-8-17-centos tools]$ ls example.sh foo foo1 foo10 foo2 hello.txt mcd.sh project1 project2 test 如上所述,我们可以touch一串foo,所有的foo都会被展开。
你也可以进行多层操作,建立笛卡尔系:
[lighthouse@VM-8-17-centos tools]$ cat <(ls project?/src/test) project1/src/test: project2/src/test: [lighthouse@VM-8-17-centos tools]$ touch project{1,2}/src/test/test{1,2,3}.py [lighthouse@VM-8-17-centos tools]$ cat <(ls project?/src/test) project1/src/test: test1.py test2.py test3.py project2/src/test: test1.py test2.py test3.py 如上,我们在创建文件的路径上有两组花括号,这会用两组展开式形成笛卡尔积,意味着展开后所有的路径有2*3组。因此当我们运行命令touch project{1,2}/src/test/test{1,2,3}.py时,实际上分别在./project1/src/test/目录下和./project2/src/test/目录下创建了test1.py,test2.py,test3.py文件。
你也可以将*通配符和{}通配符结合,甚至用一些范围表示,如
[lighthouse@VM-8-17-centos tools]$ mkdir foo bar [lighthouse@VM-8-17-centos tools]$ touch {foo,bar}/{a..d} [lighthouse@VM-8-17-centos tools]$ cat <(ls {foo,bar}/) bar/: a b c d foo/: a b c d 如上,这将会从foo/a一直到展开到foo/d,而bar目录下同理。
- diff
diff 命令用于比较文件的差异。diff 以逐行的方式,比较文本文件的异同处。如果指定要比较目录,则 diff 会比较目录中相同文件名的文件,但不会比较其中子目录。
[lighthouse@VM-8-17-centos tools]$ touch foo/x bar/y [lighthouse@VM-8-17-centos tools]$ diff <(ls foo) <(ls bar) 5c5 < x --- > y 如上,x只在第一个文件夹里,而y只在第二个文件夹内。
- 其他Shell脚本
目前为止我们只看了bash脚本,如果你喜欢其他脚本(bash对一些工作可能并不是最好的选择),你可以用很多语言写和Shell工具交互的脚本。注意,脚本并不一定只有用 bash 写才能在终端里调用。比如说,这是一段 Python 脚本,作用是将输入的参数倒序输出:
#!/usr/local/bin/python import sys for arg in reversed(sys.argv[1:]): print(arg) 如上,python默认不会尝试和Shell交互,所以我们需要导入一些库import sys。第一行叫做shebang,Shell通过它了解怎么运行这个程序。
shebang这个单词源于这行以
#!开头,#是sharp,!是bang
你可以随时键入类似python script.py a b c的命令来运行这个python脚本:
[lighthouse@VM-8-17-centos tools]$ python script.py a b c c b a 但是如果想让它从Shell就能执行呢?这就需要用到shebang行。Shell用首行识别到需要用Python解释器运行这个程序,并且第一行给出了python解释器所在的路径。
[lighthouse@VM-8-17-centos tools]$ ./script.py a b c c b a 需要注意的是不同的设备很可能会把python放在不同的地方,最好不要假设文件放在固定的位置,其他的东西要是如此。
shebang 行中使用 env 命令,会根据给出的参数(这里是python),env 会利用之前的PATH 环境变量来进行定位,在此路径中找python二进制文件,然后用该文件去解释这个脚本。这会有更好的可移植性
#!/usr/bin/env python import sys for arg in reversed(sys.argv[1:]): print(arg) - shellcheck
编写bash脚本有时候会很别扭和反直觉。例如 shellcheck 这样的工具可以帮助你定位sh/bash脚本中的错误。
shellcheck可以给出warning和语法错误提示,还能指出哪些地方你没正确引用等。
[lighthouse@VM-8-17-centos tools]$ shellcheck mcd.sh In mcd.sh line 1: mcd(){ ^-- SC2148: Tips depend on target shell and yours is unknown. Add a shebang. - Shell函数和脚本的区别
shell函数和脚本有如下一些不同点:
- 函数只能与shell使用相同的语言,脚本可以使用任意语言。因此在脚本中包含
shebang是很重要的。 - 函数仅在定义时被加载,脚本会在每次被执行时加载。这让函数的加载比脚本略快一些,但每次修改函数定义,都要重新加载一次。
- 函数会在当前的shell环境中执行,脚本会在单独的进程中执行。因此,函数可以对环境变量进行更改,比如改变当前工作目录,脚本则不行。脚本需要使用
export将环境变量导出,并将值传递给环境变量。 - 与其他程序语言一样,函数可以提高代码模块性、代码复用性并创建清晰性的结构。shell脚本中往往也会包含它们自己的函数定义。
Shell工具
查看命令如何使用
- man命令
给出一个命令,应该怎样了解如何使用这个命令行并找出它的不同的选项呢?最常用的方法是为对应的命令行添加-h 或 --help 标记。另外一个更详细的方法则是使用man 命令。man命令是手册(manual)的缩写,它提供了命令的用户手册。
事实上,目前我们给出的所有命令的说明链接,都是网页版的Linux命令手册,即使是安装的第三方命令。当然前提是开发者编写了手册并将其包含在了安装包中。在交互式的、基于字符处理的终端窗口中,一般也可以通过 :help 命令或键入 ? 来获取帮助。
- tldr (too long don't read)
有时候手册内容太过详实,让我们难以在其中查找哪些最常用的标记和语法。TLDR pages是一个很不错的替代品,它提供了一些案例,可以帮助你快速找到正确的选项。
下载tldr:
npm install -g tldr使用npm命令之前要先下载
yum -y install npm
查找文件
你当然可以使用ls,但是如果你想查找一个已经知道名字的文件或者目录,我们可以有更好的做法
- find
find大概是每个UNIX系统都有的工具,例如
[lighthouse@VM-8-17-centos tools]$ find . -name src -type d ./project1/src ./project2/src 这里意为,在当前文件夹.调用find,查找名为src 并且类型为目录的东西。键入以上命令,它就可以在当前目录递归查看所有符合规则的文件或者文件夹(find默认递归指定目录)。
find还有许多有用的flag,比如你甚至可以查询指定格式的文件路径:
[lighthouse@VM-8-17-centos tools]$ find . -path '**/test/*.py' -type f ./project1/src/test/test2.py ./project1/src/test/test1.py ./project1/src/test/test3.py ./project2/src/test/test2.py ./project2/src/test/test1.py ./project2/src/test/test3.py 这里**是指可以匹配零或者多个目录名,然后在此路径下找到拓展名为.py的文件,并要求它们在一个test文件夹内,同时检查它是否为F类型(f代表文件file)
运用不用的flag,可以进行非路径和非文件名的筛选:
比如可以查找被修改过的文件,这里-mtime代表修改时间,.当前目录下,最近1天被修改过的东西都会被列出
[lighthouse@VM-8-17-centos tools]$ find . -mtime -1 . ./project1 ./project1/src ./project1/src/test ./project1/src/test/test2.py ./project1/src/test/test1.py ./project1/src/test/test3.py ./project2 ./project2/src ./project2/src/test ./project2/src/test/test2.py ./project2/src/test/test1.py ./project2/src/test/test3.py ./test ./mcd.sh 你甚至可以使用其他条件,比如大小,所有者,权限等等。
强大的是,find不仅可以查找东西,找到之后还可以做别的:例如
我们可以在当前目录下查找所有扩展名为.tmp的文件,然后要求find对于所有这些文件,执行rm命令
[lighthouse@VM-8-17-centos tools]$ find . -name "*.tmp" ./project1/src/test/test3.tmp ./project1/src/test/test1.tmp ./project1/src/test/test2.tmp ./project2/src/test/test3.tmp ./project2/src/test/test1.tmp ./project2/src/test/test2.tmp [lighthouse@VM-8-17-centos tools]$ find . -name "*.tmp" -exec rm {} ; [lighthouse@VM-8-17-centos tools]$ echo $? 0 [lighthouse@VM-8-17-centos tools]$ find . -name "*.tmp" [lighthouse@VM-8-17-centos tools]$ 如上,执行find . -name "*.tmp" -exec rm {} ;后,对应的tmp文件都被删除了。
- fd
fd 是一个更简单、更快速、更友好的程序,它可以用来作为find的替代品。它有很多不错的默认设置,例如输出着色、默认支持正则匹配、支持unicode并且我认为它的语法更符合直觉。以模式PATTERN 搜索的语法是 fd PATTERN。
[lighthouse@VM-8-17-centos tools]$ fd ".*py" project1/src/test/test1.py project1/src/test/test2.py project1/src/test/test3.py project2/src/test/test1.py project2/src/test/test2.py project2/src/test/test3.py - locate
大多数人都认为 find 和 fd 已经很好用了,但是有的人可能想知道,我们是不是可以有更高效的方法,例如不要每次都搜索文件而是通过编译索引或建立数据库的方式来实现更加快速地搜索。
这就要靠 locate 了。 locate 使用一个由 updatedb负责更新的数据库,在大多数系统中 updatedb 都会通过 cron 每日更新。这便需要我们在速度和时效性之间作出权衡。而且,find 和类似的工具可以通过别的属性比如文件大小、修改时间或是权限来查找文件,locate则只能通过文件名。 这里有一个更详细的对比。
查找代码
查找文件是很有用的技能,但是很多时候你的目标其实是查看文件的内容。常见的场景是查找具有匹配某种模式的全部文件,并找它们的位置。
- grep
grep是用于对输入文本进行匹配的通用工具。
[lighthouse@VM-8-17-centos tools]$ grep foobar mcd.sh # foobar 使用-R可以递归地搜索
[lighthouse@VM-8-17-centos tools]$ grep -R foobar . ./example.sh: grep foobar "$file" > /dev/null 2> /dev/null ./example.sh: echo "File $file does not have any foobar, adding one" ./example.sh: echo "# foobar" >> "$file" ./hello.txt:# foobar ./mcd.sh:# foobar grep 有很多选项,这也使它成为一个非常全能的工具。 -C :获取查找结果的上下文(Context);-v 将对结果进行反选(Invert),也就是输出不匹配的结果。举例来说, grep -C 5 会输出匹配结果前后五行。当需要搜索大量文件的时候,使用 -R 会递归地进入子目录并搜索所有的文本文件。但是也有很多办法可以对 grep -R 进行改进,例如使其忽略.git 文件夹,使用多CPU等等。
- rg(ripgrep)
此外还出现了很多grep的替代品,包括 ack, ag 和 rg。它们都特别好用,但是功能也都差不多,比较常用的是 ripgrep (rg) ,因为它速度快,而且用法非常符合直觉。
[lighthouse@VM-8-17-centos tools]$ rg "foobar" -t sh ~/ /home/lighthouse/missing/tools/mcd.sh 5:# foobar /home/lighthouse/missing/tools/example.sh 8: grep foobar "$file" > /dev/null 2> /dev/null 12: echo "File $file does not have any foobar, adding one" 13: echo "# foobar" >> "$file" 如上,该命令在~/目录下搜索类型(-t即type)为sh,并且文件内有“foobar”子串的文件。
rg不仅能找到对应文件,还能精确到匹配的行,比起使用grep,它还增加了代码彩色显示和文件处理啥的,也有Unicode支持,并且运行很快。
rg有许多有用的flag,比如说你想要点上下文(匹配内容的附近内容),例如:
[lighthouse@VM-8-17-centos tools]$ rg "foobar" -t sh -C 5 ~/ /home/lighthouse/missing/tools/mcd.sh 1-mcd(){ 2- mkdir -p "$1" 3- cd "$1" 4-} 5:# foobar /home/lighthouse/missing/tools/example.sh 3-echo "Start program at $(date)" # Date will be substituted 4- 5-echo "Running program $0 with $# arguments with pid $$" 6- 7-for file in "$@";do 8: grep foobar "$file" > /dev/null 2> /dev/null 9- # When pattern is not found,grep has exit status 10- # We redirect STDOUT and STDERR to a null register .. 11- if [[ "$?" -ne 0 ]]; then 12: echo "File $file does not have any foobar, adding one" 13: echo "# foobar" >> "$file" 14- fi 15-done 如上,我们加上-C [num](C意为context),不仅能够搜索到匹配内容,还能对每一个匹配的内容显示其前后[num]行的内容。这样你就可以知道匹配内容大概在什么位置,它周围都是什么内容。这个功能在查找在哪调用了什么函数 上十分有用。
我们也可以使用一个更高级的用法:
-u意为不忽略隐藏文件,--files-without-match是打印出所有不匹配这个pattern的内容,'#!'的意思是匹配有#!的内容。也就是说,我们在搜索没有shebang的文件。
[lighthouse@VM-8-17-centos tools]$ rg -u --files-without-match '#!' -t sh mcd.sh 此外rg还有些好用的flag,比如--stats这个flag,
[lighthouse@VM-8-17-centos tools]$ rg "foobar" -t sh -C 5 --stats ~/ /home/lighthouse/missing/tools/mcd.sh 1-mcd(){ 2- mkdir -p "$1" 3- cd "$1" 4-} 5:# foobar /home/lighthouse/missing/tools/example.sh 3-echo "Start program at $(date)" # Date will be substituted 4- 5-echo "Running program $0 with $# arguments with pid $$" 6- 7-for file in "$@";do 8: grep foobar "$file" > /dev/null 2> /dev/null 9- # When pattern is not found,grep has exit status 10- # We redirect STDOUT and STDERR to a null register .. 11- if [[ "$?" -ne 0 ]]; then 12: echo "File $file does not have any foobar, adding one" 13: echo "# foobar" >> "$file" 14- fi 15-done 4 matches 4 matched lines 2 files contained matches 5 files searched 643 bytes printed 978 bytes searched 0.000054 seconds spent searching 0.002657 seconds 如上,它除了搜索结果之外,还可以输出一些信息。比如成功匹配了多少行,查找了多少行和多少文件,打印了多少byte等。
- ack
ack也是grep的一个替代工具,还有ag 。当然这些工具都是可以替换的,只要会使用即可。
查找shell命令
- 向上箭头
首先,按向上的方向键会显示你使用过的上一条命令,继续按上键则会遍历整个历史记录。
向上箭头并不是很有效率,所以bash有一些更加简单的方法。
- history
它会打印出你的命令历史记录,当然一般来讲这会输出非常多的记录,你可以使用管道和grep来筛选。
[lighthouse@VM-8-17-centos tools]$ history | grep echo 74 2022-12-29 01:16:27 echo $? 112 2022-12-29 01:45:37 echo "# foobar" >> mdc.sh 115 2022-12-29 01:46:01 echo "# foobar" >> mcd.sh 126 2022-12-29 01:50:42 echo "hello,i am a txt file" > hello.txt 197 2022-12-30 01:06:13 history | grep echo - Ctrl+R
基本上,所有Shell都会默认把Ctrl+R这个组合键设成(按执行时间)倒叙搜索(backward search)
我们打开(按ctrl+r)倒叙搜索,然后输入echo,就会找到与之匹配的命令,如果我们接着按ctrl+r,就会倒着往前搜索匹配的命令,也可以重新执行命令。
- fzf
Ctrl+R 可以配合 fzf 使用。fzf 是一个通用对模糊查找工具,它可以和很多命令一起使用。这里我们可以对历史命令进行模糊查找并将结果以赏心悦目的格式输出
- 基于历史的自动补全
另外一个和历史命令相关的技巧我喜欢称之为基于历史的自动补全。 这一特性最初是由 fish shell 创建的,它可以根据你最近使用过的开头相同的命令,动态地对当前对shell命令进行补全。这一功能在 zsh 中也可以使用,它可以极大的提高用户体验。
你可以修改 shell history 的行为,例如,如果在命令的开头加上一个空格,它就不会被加进shell记录中。当你输入包含密码或是其他敏感信息的命令时会用到这一特性。 为此你需要在
.bashrc中添加HISTCONTROL=ignorespace或者向.zshrc添加setopt HIST_IGNORE_SPACE。 如果你不小心忘了在前面加空格,可以通过编辑。bash_history或.zhistory来手动地从历史记录中移除那一项。
文件夹导航
你可以使用ls -R递归地列出某目录下所有的文件和目录,但是这样列出的东西比较难理解。
- tree
有一个叫tree的工具可以以比较友好的格式打印出目录的结构。
centos安装:sudo yum -y install tree
[lighthouse@VM-8-17-centos tools]$ tree /home /home `-- lighthouse `-- missing `-- tools |-- example.sh |-- hello.txt |-- mcd.sh |-- project1 | `-- src | `-- test | |-- test1.py | |-- test2.py | `-- test3.py |-- project2 | `-- src | `-- test | |-- test1.py | |-- test2.py | `-- test3.py `-- test 10 directories, 9 files - broot
broot也是做差不多的事情,但是比起列出所有文件,它会提示[还有更多文件,未列出]。你可以输入字符,broot可以模糊匹配符合条件的文件,并进行动态显示。这样你就可以快速的选择和定位。
- nnn
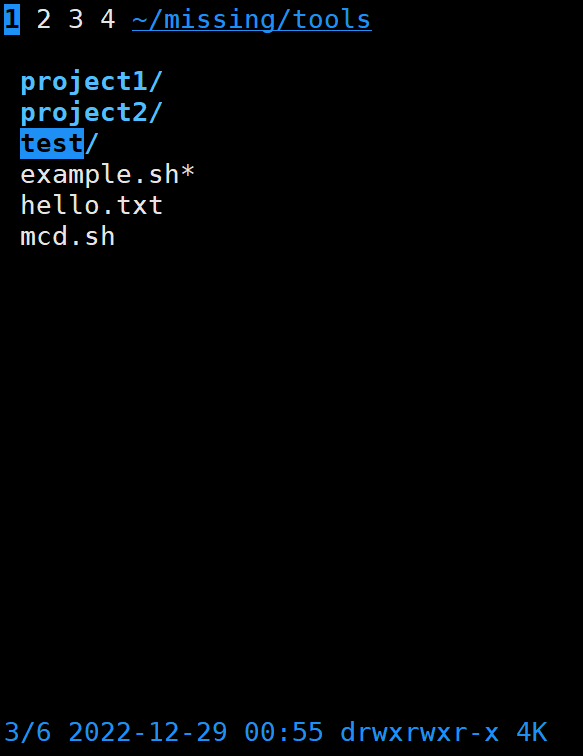
nnn 默认列出运行 nnn 的当前目录的文件和文件夹。 文件夹列在顶部,而文件列在底部。而且是一个交互性的窗口,你可以通过向左箭头返回上一级目录,通过向右箭头到达子目录。按q即可退出窗口。
centos 安装 nnn :sudo yum install nnn
- ranger
ranger 是一个基于文本的由 Python 编写的文件管理器。不同层级的目录分别在一个面板的三列中进行展示. 可以通过快捷键, 书签, 鼠标以及历史命令在它们之间移动. 当选中文件或目录时, 会自动显示文件或目录的内容。
由于本课程的目的是尽可能对你的日常习惯进行优化。因此,我们可以使用fasd和 autojump 这两个工具来查找最常用或最近使用的文件和目录。
Fasd 基于 frecency 对文件和文件排序,也就是说它会同时针对频率(frequency)和时效(recency)进行排序。默认情况下,fasd使用命令 z 帮助我们快速切换到最常访问的目录。例如, 如果您经常访问/home/user/files/cool_project 目录,那么可以直接使用 z cool 跳转到该目录。对于 autojump,则使用j cool代替即可。
练习
-
阅读
man ls,然后使用ls命令进行如下操作:- 所有文件(包括隐藏文件)
- 文件打印以人类可以理解的格式输出 (例如,使用454M 而不是 454279954)
- 文件以最近访问顺序排序
- 以彩色文本显示输出结果
典型输出如下:
-rw-r--r-- 1 user group 1.1M Jan 14 09:53 baz drwxr-xr-x 5 user group 160 Jan 14 09:53 . -rw-r--r-- 1 user group 514 Jan 14 06:42 bar -rw-r--r-- 1 user group 106M Jan 13 12:12 foo drwx------+ 47 user group 1.5K Jan 12 18:08 ..
练习:
(1) 显示包括隐藏文件
-a, --all
do not ignore entries starting with .[lighthouse@VM-8-17-centos tools]$ ls -a . .. example.sh hello.txt mcd.sh project1 project2 test(2) 文件以人类可以理解的格式输出
-h, --human-readable
with -l, print sizes in human readable format (e.g., 1K 234M 2G)[lighthouse@VM-8-17-centos tools]$ ls -hl total 24K -rwxrwxr-- 1 lighthouse lighthouse 494 Dec 29 01:49 example.sh -rw-rw-r-- 1 lighthouse lighthouse 31 Dec 29 01:55 hello.txt -rw-rwxr-- 1 lighthouse lighthouse 42 Dec 29 01:46 mcd.sh drwxrwxr-x 3 lighthouse lighthouse 4.0K Dec 29 00:47 project1 drwxrwxr-x 3 lighthouse lighthouse 4.0K Dec 29 00:47 project2 drwxrwxr-x 2 lighthouse lighthouse 4.0K Dec 29 00:55 test(3) 文件以最近访问顺序排序
-t sort by modification time, newest first
[lighthouse@VM-8-17-centos tools]$ ls -lt total 24 -rw-rw-r-- 1 lighthouse lighthouse 31 Dec 29 01:55 hello.txt -rwxrwxr-- 1 lighthouse lighthouse 494 Dec 29 01:49 example.sh -rw-rwxr-- 1 lighthouse lighthouse 42 Dec 29 01:46 mcd.sh drwxrwxr-x 2 lighthouse lighthouse 4096 Dec 29 00:55 test drwxrwxr-x 3 lighthouse lighthouse 4096 Dec 29 00:47 project1 drwxrwxr-x 3 lighthouse lighthouse 4096 Dec 29 00:47 project2(4) 以彩色文本显示输出结果
--color[=WHEN]
colorize the output; WHEN can be 'never', 'auto', or 'always' (the default); more info below[lighthouse@VM-8-17-centos tools]$ ls --color=auto example.sh hello.txt mcd.sh project1 project2 test综合:
[lighthouse@VM-8-17-centos tools]$ ls -laht --color=auto total 32K drwxrwxr-x 5 lighthouse lighthouse 4.0K Dec 30 01:14 . -rw-rw-r-- 1 lighthouse lighthouse 31 Dec 29 01:55 hello.txt -rwxrwxr-- 1 lighthouse lighthouse 494 Dec 29 01:49 example.sh -rw-rwxr-- 1 lighthouse lighthouse 42 Dec 29 01:46 mcd.sh drwxrwxr-x 2 lighthouse lighthouse 4.0K Dec 29 00:55 test drwxrwxr-x 3 lighthouse lighthouse 4.0K Dec 29 00:47 project1 drwxrwxr-x 3 lighthouse lighthouse 4.0K Dec 29 00:47 project2 drwxrwxr-x 3 lighthouse lighthouse 4.0K Dec 29 00:46 .. -
编写两个bash函数
marco和polo执行下面的操作。 每当你执行marco时,当前的工作目录应当以某种形式保存,当执行polo时,无论现在处在什么目录下,都应当cd回到当时执行marco的目录。 为了方便debug,你可以把代码写在单独的文件marco.sh中,并通过source marco.sh命令,(重新)加载函数。练习:
marco.sh:
marco(){ echo "$(pwd)" > ~/pwd.txt } polo(){ jump=$(cat ~/pwd.txt) # 使用$(命令)的方式可以赋给变量 cd "$jump" echo "You had alread jump to -->$jump" }测试:
[lighthouse@VM-8-17-centos tools]$ source marco.sh [lighthouse@VM-8-17-centos tools]$ marco [lighthouse@VM-8-17-centos tools]$ cd / [lighthouse@VM-8-17-centos /]$ polo You had alread jump to -->/home/lighthouse/missing/tools [lighthouse@VM-8-17-centos tools]$ -
假设您有一个命令,它很少出错。因此为了在出错时能够对其进行调试,需要花费大量的时间重现错误并捕获输出。 编写一段bash脚本,运行如下的脚本直到它出错,将它的标准输出和标准错误流记录到文件,并在最后输出所有内容。 加分项:报告脚本在失败前共运行了多少次。
#!/usr/bin/env bash n=$(( RANDOM % 100 )) if [[ n -eq 42 ]]; then echo "Something went wrong" >&2 echo "The error was using magic numbers" exit 1 fi echo "Everything went according to plan"练习:
上述脚本的意思是,取一个随机数(RANDOM变量用于生成0~32767之前的任意随机数),随机数模100。如果结果等于42,就输出两句话,然后返回1退出码;否则就输出”Everything went according to plan“
这里的
>&2的意思是 将标准输出1和标准错误输出2 都重定向到终端中(标准输出或标准错误输出的目的地默认都为终端)run.sh(buggy.sh为题目的脚本名)
count=1 while true do ./buggy.sh 1>> out.log 2>&1 #把stout和sterr一起重定向到out.log文件中(追加) if [[ $? -ne 0 ]]; then echo "运行错误,记录在out.log中" echo "共运行 $count 次" break fi ((count++)) done[lighthouse@VM-8-17-centos tools]$ ./run.sh 运行错误,记录在out.log中 共运行 82 次 [lighthouse@VM-8-17-centos tools]$ ./run.sh 运行错误,记录在out.log中 共运行 42 次 -
本节课我们讲解的
find命令中的-exec参数非常强大,它可以对我们查找的文件进行操作。但是,如果我们要对所有文件进行操作呢?例如创建一个zip压缩文件?我们已经知道,命令行可以从参数或标准输入接受输入。在用管道连接命令时,我们将标准输出和标准输入连接起来,但是有些命令,例如tar则需要从参数接受输入。这里我们可以使用xargs命令,它可以使用标准输入中的内容作为参数。 例如ls | xargs rm会删除当前目录中的所有文件。您的任务是编写一个命令,它可以递归地查找文件夹中所有的HTML文件,并将它们压缩成zip文件。注意,即使文件名中包含空格,您的命令也应该能够正确执行(提示:查看
xargs的参数-d,译注:MacOS 上的xargs没有-d,查看这个issue)如果您使用的是 MacOS,请注意默认的 BSD
find与 GNU coreutils 中的是不一样的。你可以为find添加-print0选项,并为xargs添加-0选项。作为 Mac 用户,您需要注意 mac 系统自带的命令行工具和 GNU 中对应的工具是有区别的;如果你想使用 GNU 版本的工具,也可以使用 brew 来安装。练习:
事先在当前文件夹下创建了一些html文件(包括带有空格的he llo.html)
[lighthouse@VM-8-17-centos question4]$ tree . |-- he llo.html |-- index.html |-- project1 | |-- test | |-- test1.html | |-- test2.html | `-- test3.html |-- project2 | |-- test | |-- test1.html | |-- test2.html | `-- test3.html |-- test1.html |-- test2.html |-- test3.html |-- test4.html |-- test5.html |-- test6.html |-- test7.html |-- test8.html `-- test9.html 4 directories, 17 files使用命令:
[lighthouse@VM-8-17-centos question4]$ find . -name "*.html" | xargs -d 'n' tar -cf html.zip查看压缩包内容:
可以看到包括有空格文件名的html在内全部压缩成功
[lighthouse@VM-8-17-centos question4]$ tar -tf html.zip ./project1/test3.html ./project1/test2.html ./project1/test1.html ./test6.html ./test3.html ./test8.html ./test4.html ./test9.html ./project2/test3.html ./project2/test2.html ./project2/test1.html ./test5.html ./he llo.html ./test2.html ./index.html ./test1.html ./test7.htmlxargs使用教程 Linux下查看压缩文件内容的 10 种方法
使用
tar -tf命令可以在不提取tar文件的情况下查看压缩包内容。 -
(进阶)编写一个命令或脚本递归的查找文件夹中最近使用的文件。更通用的做法,你可以按照最近的使用时间列出文件吗?
[lighthouse@VM-8-17-centos question4]$ find . -type f -mmin -120 | xargs -d 'n' ls -tl | head -3 -rw-rw-r-- 1 lighthouse lighthouse 10240 Jan 3 22:01 ./html.zip -rw-rw-r-- 1 lighthouse lighthouse 0 Jan 3 21:36 ./he llo.html -rw-rw-r-- 1 lighthouse lighthouse 0 Jan 3 21:15 ./project1/test1.html


