- A+
前言
之前写了一个vue+django的一个通过串口控制的上位机系统。但是实际生产中,不如部署到服务器上,这样可以更好的节约成本。但是这样就需要弄一个客户端来控制处理串口信息。那我就在想能不能通过网页直接拿到客户端的串口信息。所以问了万能的chatgpt,得到了以下答案:
是的,前端可以使用 Web SerialAPI直接与客户端机器的串口通信,而Diango只需要负责存储数据。当客户端机器发送数据时,前端可以将数据发送到 Diango服务器,Diango 服务器再将数据存储到数据库中。当需要读取数据时,前端可以从 Django服务器中获取数据并显示在页面上。
所以我去研究了下Web Serial Api
一、什么是Web Serial Api
官方:https://wicg.github.io/serial/#open-method
Web Serial API 是一个用于访问串行设备的 Web API,它允许 web 应用程序与串行设备(如 Arduino、传感器、GPS 接收器等)进行通信。使用 Web Serial API,你可以在 web 应用程序中读取和写入串行数据,就像使用本地应用程序一样。
Web Serial API 是由 W3C Web 原生设备和传感器工作组开发的,它已经成为标准的一部分,目前已经在主流浏览器中得到了支持,包括 Chrome、Edge、Firefox 和 Opera。
使用 Web Serial API,你可以在 web 应用程序中执行以下操作:
- 请求用户授权访问串行端口
- 打开和关闭串行端口
- 读取和写入串行数据
- 监听来自串行设备的数据
- 设置串行端口的参数,例如波特率、数据位、停止位、奇偶校验等。
Web Serial API 的优点在于它可以在没有任何插件或安装软件的情况下访问串行设备,因此它非常适合用于构建基于 web 的物联网应用程序。
二、vite项目运行在https协议
如果想使用Web Serial Api就需要把项目运行在https模式下
其实可以简单验证下:
if ("serial" in navigator) { console.log("Web Serial API is supported!"); } else { console.log("Web Serial API is not supported!"); } 正常在http模式下是不成功的。
首先需要把项目在https模式运行,这里先用简单证书去处理。
错误示范:
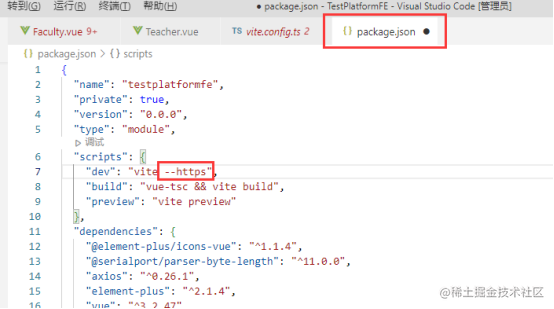
直接加--https 运行时在https上 但是会报错:
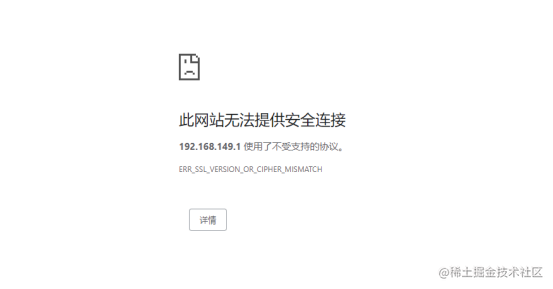
这个时候需要自己获取SSL证书
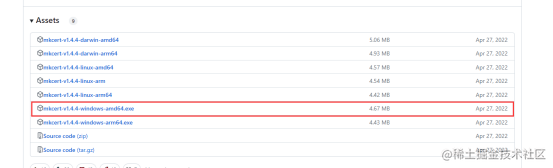
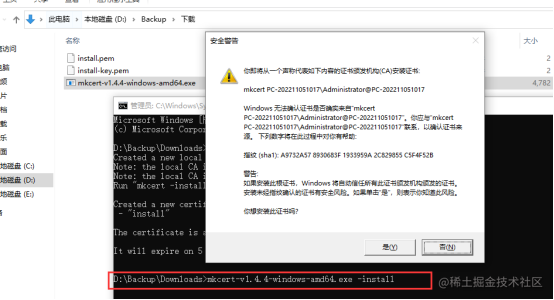
Windows使用mkcert颁发证书及应用
1、下载:
https://github.com/FiloSottile/mkcert/releases/tag/v1.4.4
在下载好的文件下
打开cd 找到文件 输入mkcert-v1.4.3-windows-amd64.exe -install(根据你实际包来)
这个时候我们就看到2个pem文件了
Vite配置
把上面生成的两个文件放到项目根目录keys文件夹
在vite.config.ts中修改为(请根据情况按需修改):
import * as fs from 'fs' import path from 'path' // https://vitejs.dev/config/ export default defineConfig({ plugins: [vue()], resolve: { alias: { '@': path.join(__dirname, 'src') } }, server:{ host:"192.168.149.1", port:8080, open:true, https:{ key:fs.readFileSync(path.join(__dirname, 'key/install-key.pem')), cert:fs.readFileSync(path.join(__dirname, 'key/install.pem')), }, }, }) 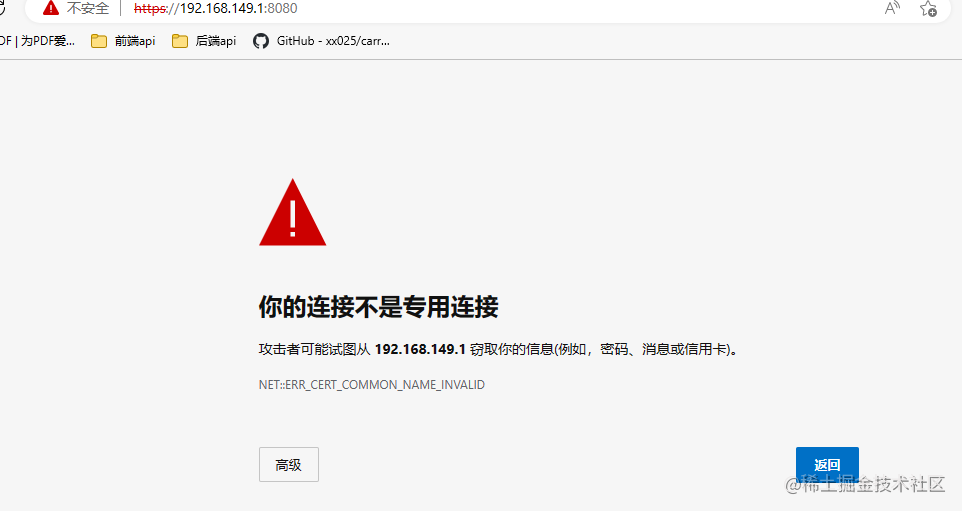
选择高级
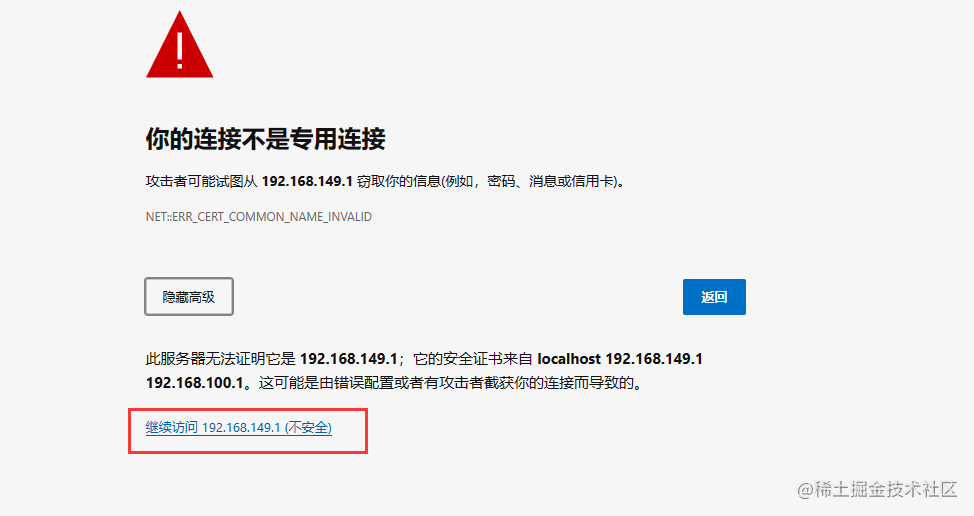
这样我们的项目就运行在

这样就解决了这个问题。
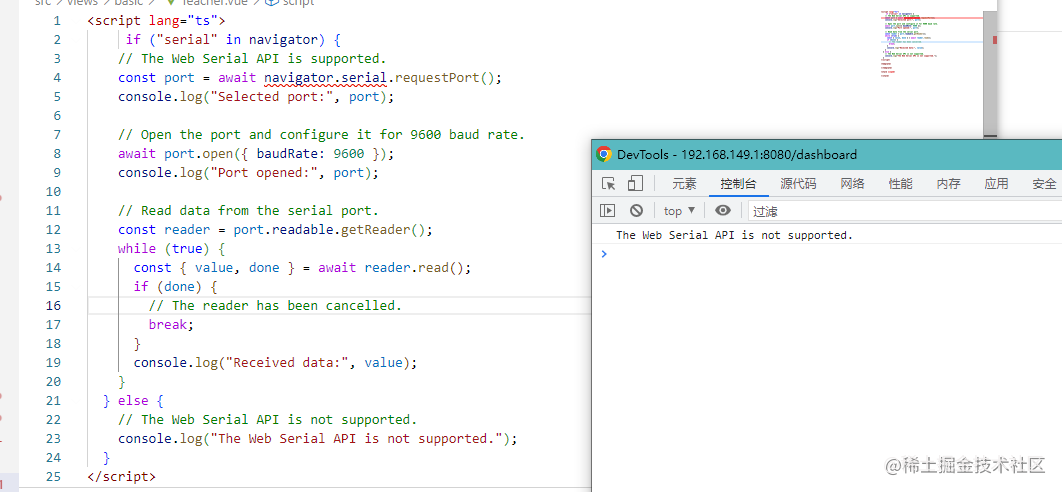
三、Web Serial Api简单使用
串口的选择
<script> const port = await navigator.serial.requestPort(); await port.open({baudRate:9600}); const reader = port.readable.getReader(); </script> <template> </template> <style scoped> </style> 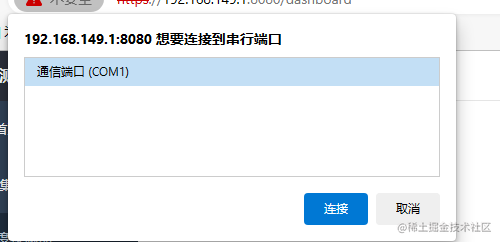
串口接受消息
// 提示用户选择一个串口 const port = await navigator.serial.requestPort(); await port.open({baudRate:9600}); const reader = port.readable.getReader(); let buffer = ''; // 缓冲区 // 监听来自串口的数据 while (true) { const { value } = await reader.read(); if (value) { const textDecoder = new TextDecoder('utf-8'); const str = textDecoder.decode(value); buffer += str; // 将读取到的数据添加到缓冲区中 // 判断缓冲区中是否存在完整的数据包 const completePacketIndex = buffer.indexOf('n'); if (completePacketIndex !== -1) { const completePacket = buffer.substring(0, completePacketIndex); buffer = buffer.substring(completePacketIndex + 1); // 处理完整的数据包 console.log(completePacket); } } } 串口发送消息
const writer = port.writable.getWriter(); const data = new Uint8Array([104, 101, 108, 108, 111]); // hello setInterval(async () => { await writer.write(data); }, 2000);